Completely Remove Bitdefender Antivirus Plus 2018 from Windows Device, PC Tutorial
BitDefender Antivirus Plus is one of the most respected and advanced anti-virus programs currently on the market. Not only is this bundle able to detect well-known threats, but the fact that it is updated on a regular basis signifies that emerging viruses can likewise be thwarted before they cause real damage. Despite the protection it brings to your computer, you might encounter a variety of problems when it is running on your system, and you decide to repair or even uninstall it. However, you may not be able to successfully reinstall or remove Bitdefender Antivirus Plus 2018 sometimes.
How to fix uinstallation errors? What is the proper way to get rid of it? If you are confused by these troubles, then you come to the right place. This article details two removal solution, both manually and automatically, to ensure a safe and clean removal tutorial of BitDefender Antivirus Plus 2018.
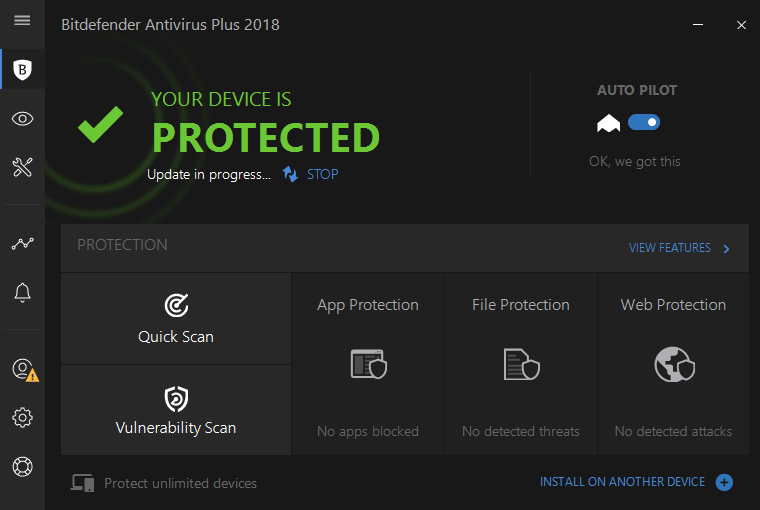
Manually Remove BitDefender Antivirus Plus 2018 via Control Panel
We provide several ways to remove Bitdefender Antivirus Plus 2018 in different systems of Windows, follow out guides to delete it now.
In Windows 7:
1. Reboot your computer into Safe Mode
- Reboot the computer, and then press the F8 key as soon as you see the Windows’ logo appearing, select the regular Safe Mood and press Enter key.
2. Quit all the processes of BitDefender Antivirus Plus
- Launch the Windows Task Manager by pressing shortcuts Ctrl +Alt +Delete;
- Select the target process of BitDefender Antivirus Plus running in Manager;
- Hit “End Task” to close.
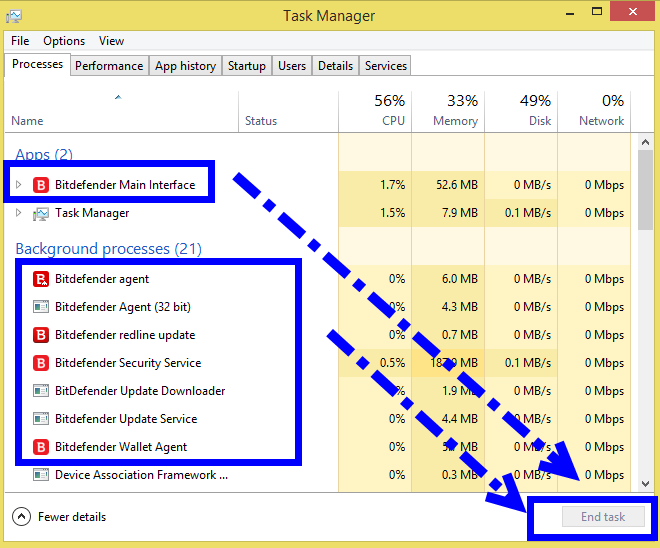
3. Launch the Control Panel to remove BitDefender Antivirus Plus
- Click Start, go to Control Panel and double-click Programs and Features;
- Find Bitdefender and select Uninstall;
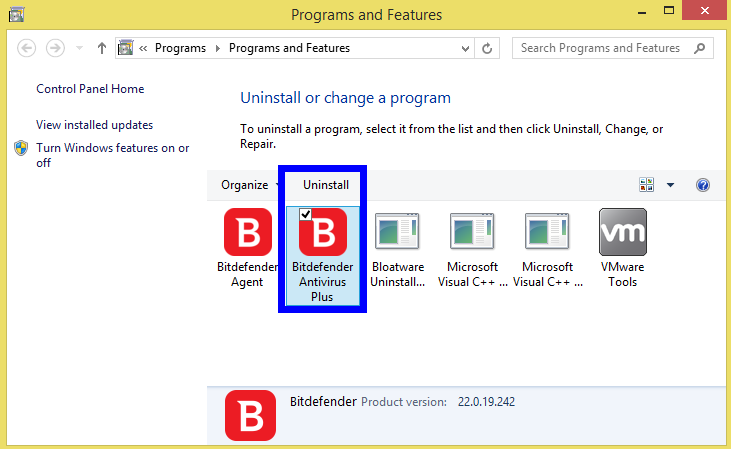
- Click Remove in the window that appears between two option:
I want to reinstall it or I want to permanently remove it.

- Click Next to continue.
- Wait for the uninstall process to complete, then reboot your system.
In Windows 8 and Windows 8.1:
1. Reboot your computer into Safe Mode
- Access the Run dialogue by pressing the Windows + R keys, type “msconfig” and click on OK.
Click the Boot tab in the System Configuration interface, check the “Safe boot” box and click on OK. - Then your computer will boot into Safe Mode after it restarts
2. Quit all the processes of BitDefender Antivirus Plus
- Launch the Windows Task Manager by pressing shortcuts Ctrl +Alt +Delete;
- Select the target process of BitDefender Antivirus Plus running in Manager;
- Hit “End Task” to close.

3. Launch Programs and Features to remove BitDefender Antivirus Plus
- Click the Start menu, then Programs and Features;
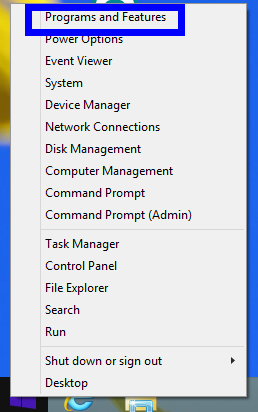
- Find Bitdefender and select Uninstall.
- Click Remove in the window that appears between two option:
I want to reinstall it or I want to permanently remove it.

- Click Next to continue.
- Wait for the uninstall process to complete, then reboot your system.
NOTE: To be sure that everything is properly removed, we also recommend using our dedicated uninstall tool. Download the uninstall tool corresponding to your version of Bitdefender from this location and then run it on your system.
In Windows 10:
1. Reboot your computer into Safe Mode
- Press Windows logo key Windows logo key + I on your keyboard to open Settings.
- Select Update & security > Recovery.
- Under Advanced startup, select Restart now.
- After your PC restarts to the Choose an option screen, select Troubleshoot > Advanced options > Startup Settings > Restart.
- After your PC restarts, you’ll see a list of options. Select 4 or F4 to start your PC in Safe Mode.
- Or if you’ll need to use the Internet, select 5 or F5 for Safe Mode with Networking.
2. Quit all the processes of BitDefender Antivirus Plus
- Launch the Windows Task Manager by pressing shortcuts Ctrl +Alt +Delete;
- Select the target process of BitDefender Antivirus Plus running in Manager;
- Hit “End Task” to close.

3. Launch the Apps and Features to remove BitDefender Antivirus Plus
- Right click Start, then click Apps and Features;
- Find Bitdefender and select Uninstall;
- Click Uninstall again to confirm your choice;
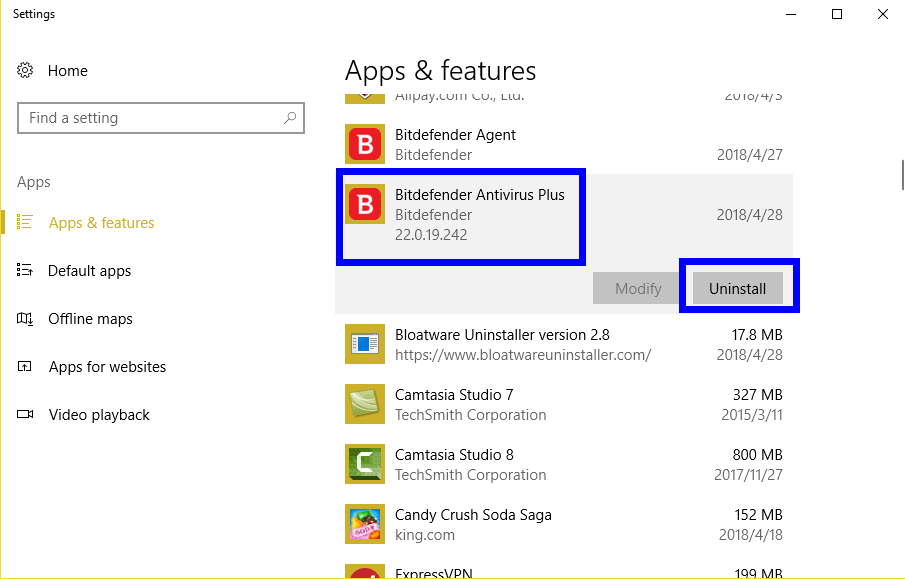
- Click Remove in the window that appears between two option:
I want to reinstall it or I want to permanently remove it.

- Click Next to continue;
- Wait for the uninstall process to complete, then reboot your system.
Automatically Remove BitDefender Antivirus Plus 2018 via Bloatware uninstaller
Way too long to remove BitDefender Antivirus Plus 2018 using the conventional method by manual? Don’t worry, here is an easier way to help you fast uninstall BitDefender Antivirus Plus. Follow the PC tutorial bellow to get rid of any unwanted apps on your device.
1. Download Automated Tool and install in your computer
2. Quit all the processes of BitDefender Antivirus Plus
- Launch the Windows Task Manager by pressing shortcuts Ctrl +Alt +Delete;
- Select the target process of BitDefender Antivirus Plus running in Manager;
- Hit “End Task” to close.
3. Follow the BU instruction to uninstall
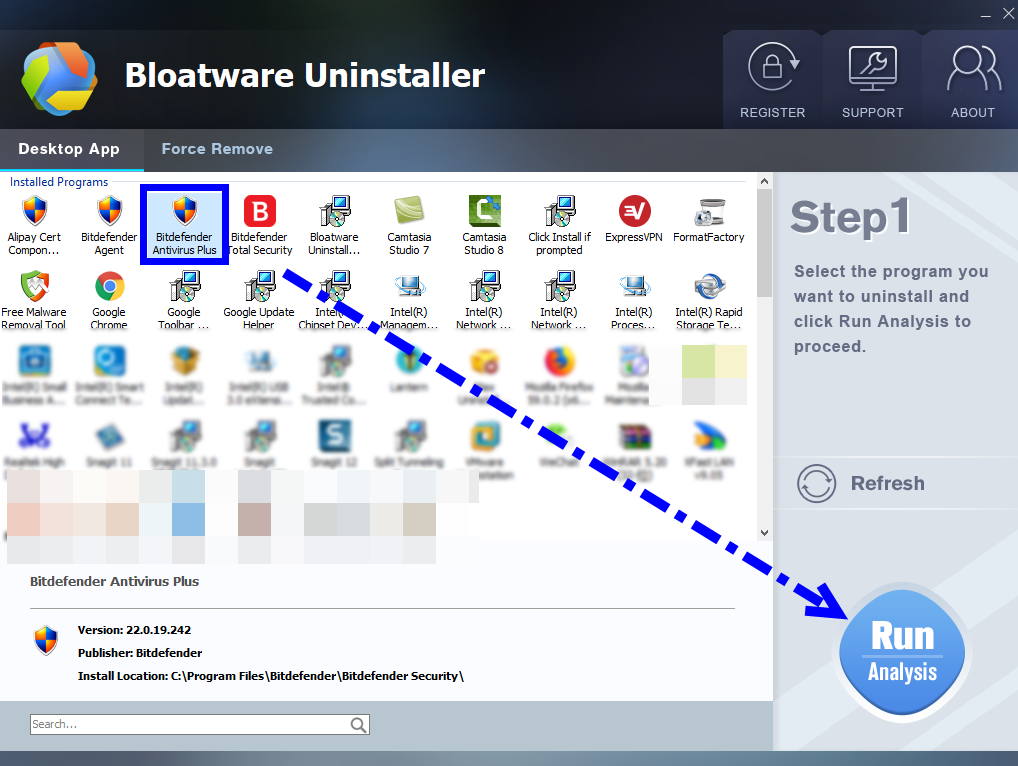
Step 1. Select Target Program
- Launch Bloatwarw Uninstaller, then select BitDefender Antivirus Plus 2018 on the interface and click on Run Analysis to proceed.
Step 2. Scan for Program Components
- Click on Complete Uninstall after all the components are scanned out;
- Click Next, and then Remove in the pop-up dialog and follow the prompts to complete the removal until it Finish;
- Click on Scan Leftovers to conduct a full scan for the program leftover.

Step 3. Perform Complete Uninstall
- Click on Delete Leftovers and then Yes in the pop-up confirmation dialog;
- After all the leftovers have been removed completely, click OK to end the process;
- Back to Step 1, you will find BitDefender Antivirus Plus is gone, as well all the leftovers;
By now, you must have successfully removed BitDefender Antivirus Plus 2018 from computer. any question that can’t uninstall it, please leave a message on the comment section.
More tip: Bitdefender Antivirus Plus 2018 Review (video)
- Antivirus Program, Security Software
- 28 Apr 2018


