How to Efficiently Remove Glary Disk Cleaner in Windows
If you have no idea how to correctly remove Glary Disk Cleaner in Windows, here is your chance to learn.
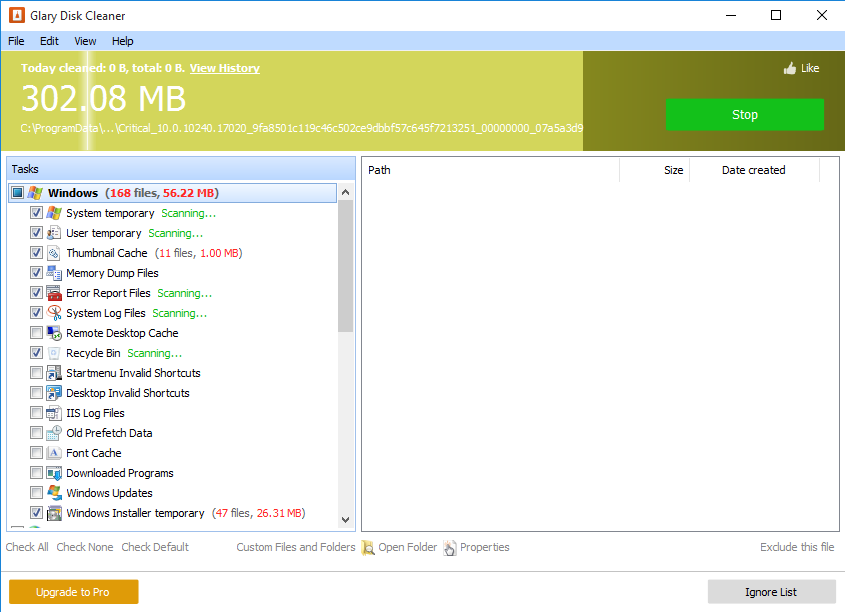
Glary Disk Cleaner is designed to provide simple use including just several clicks. Its professional rapid scanning kernel can quickly scan all the unnecessary files on your disk, and enables you to remove them right away.
Pros:
- Custom cleanup support
- Ignore list support
- Clean up history at a glance
Cons:
- Sometimes it takes time to finish the scanning
- Pop-up windows and web pages
- A bit hard to complete uninstall
In this article I’ve provided three methods for you to remove Glary Disk Cleaner, just enjoy the browsing. If there is anything I’ve missed, leave your comments, letting me know how to improve this page.

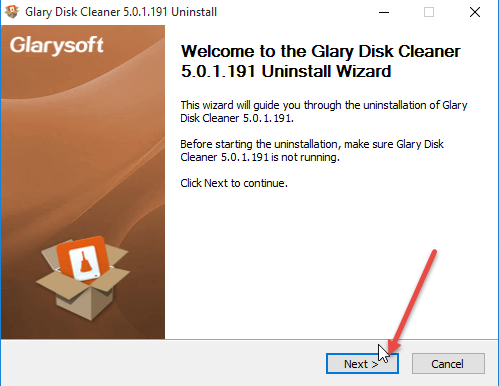
Method 1: Remove Glary Disk Cleaner through its Uninstall.exe
1. Open the File Explorer: click the Folder icon on the taskbar (or right-click on the Start and select File Explorer)
2. Open the Disk that you installed the Glary Disk Cleaner program (right-click the program icon and select properties to find out), and successively open Program Files (x86) > Glarysoft > Glary Disk Cleaner.
3. Double-click the Uninst.exe file under the said folder, and the uninstall will begin.
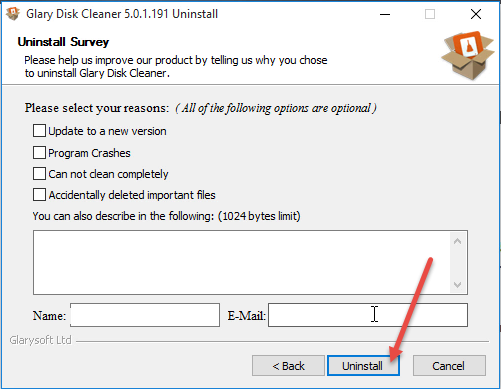
4. During the uninstall process, you’ll be asked “Would you like to keep your personal settings for Glary Disk Cleaner?” If you plan on a reinstallation, then click Yes, otherwise click No.
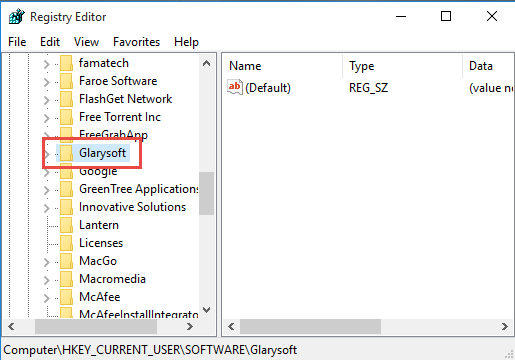
5. Once the above process is done, execute “regedit” via the Search field on the taskbar to open the Registry Editor.
6. Navigate to HKEY_CURRENT_USER\Software\, if you can see a folder named Glarysoft, delete it to completely remove Glary Disk Cleaner. But if there is any other Glarysoft products installed on your PC, skip this, or they could malfunction.
7. Restart your computer to take effect.
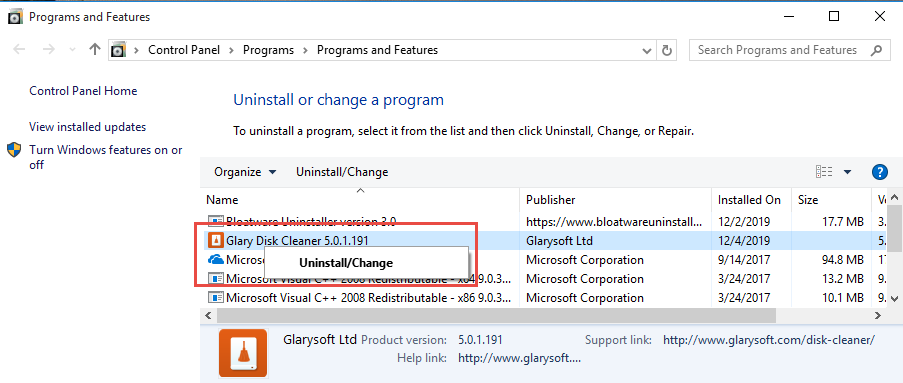
Method 2: Remove Glary Disk Cleaner through the Programs and Features
1. Right-click on the Start and select Programs and Features, where you can see clearly what programs you’re having on this machine.
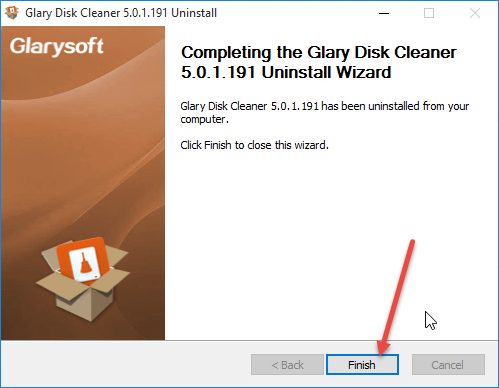
2. In the list, locate and double-click Glary Disk Cleaner to activate the built-in uninstaller, and the removal will begin right away.
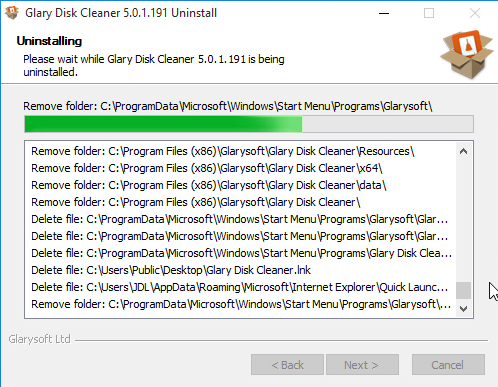
3. During the uninstall process, you’ll be asked “Would you like to keep your personal settings for Glary Disk Cleaner?” If you plan on a reinstallation, then click Yes, otherwise click No.
4. Once the above process is done, execute “regedit” via the Search field on the taskbar to open the Registry Editor.
5. Navigate to HKEY_CURRENT_USER\Software\, if you can see a folder named Glarysoft, delete it to completely remove Glary Disk Cleaner. But if there is any other Glarysoft products installed on your PC, skip this, or they could malfunction.
6.Restart your computer to take effect.
Method 3: Remove Glary Disk Cleaner with A Trustworthy Tool
I believe most users would yearn for an easier approach to remove Glary Disk Cleaner, as well as remove some other stubborn software & potentially unwanted programs, without worrying the different operations in different versions of Windows. Take a quick view at the whole process here:
Comparing the first method, this one should be easier and faster – It is called Bloatware Uninstaller, with which you can always completely uninstall any program by going through the same steps. Followed each serial number there are the buttons you’ll need to go through, with description just for you to have a better understand of what you’re doing.
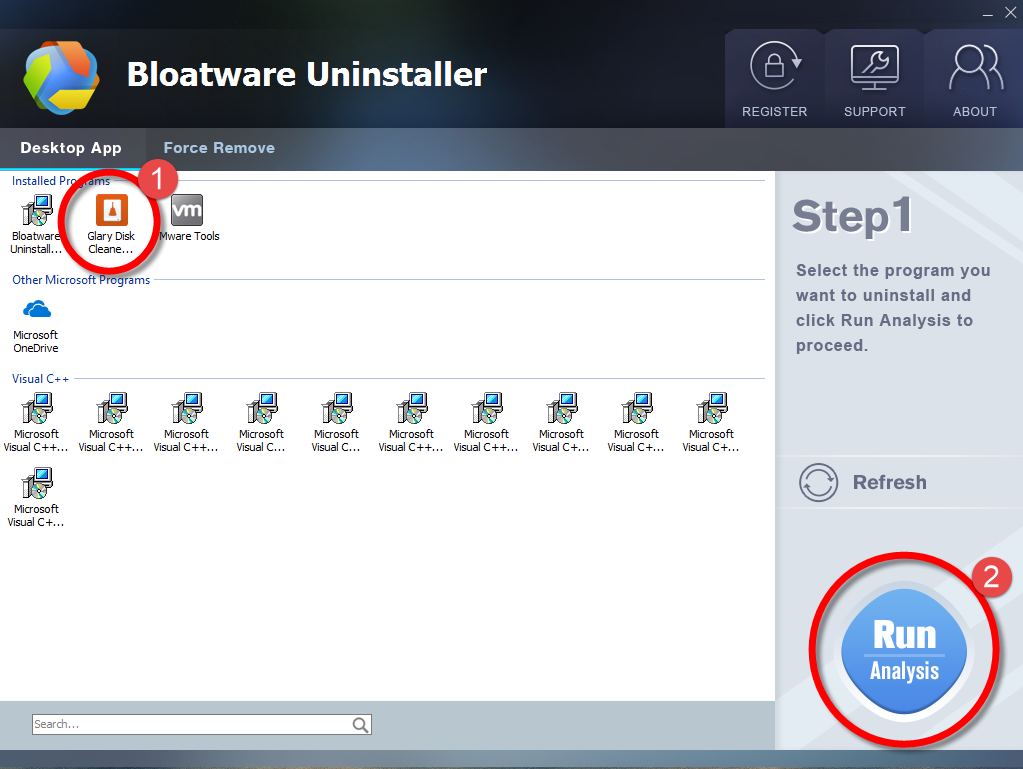
1. Download, install and launch Bloatware Uninstaller from your desktop.
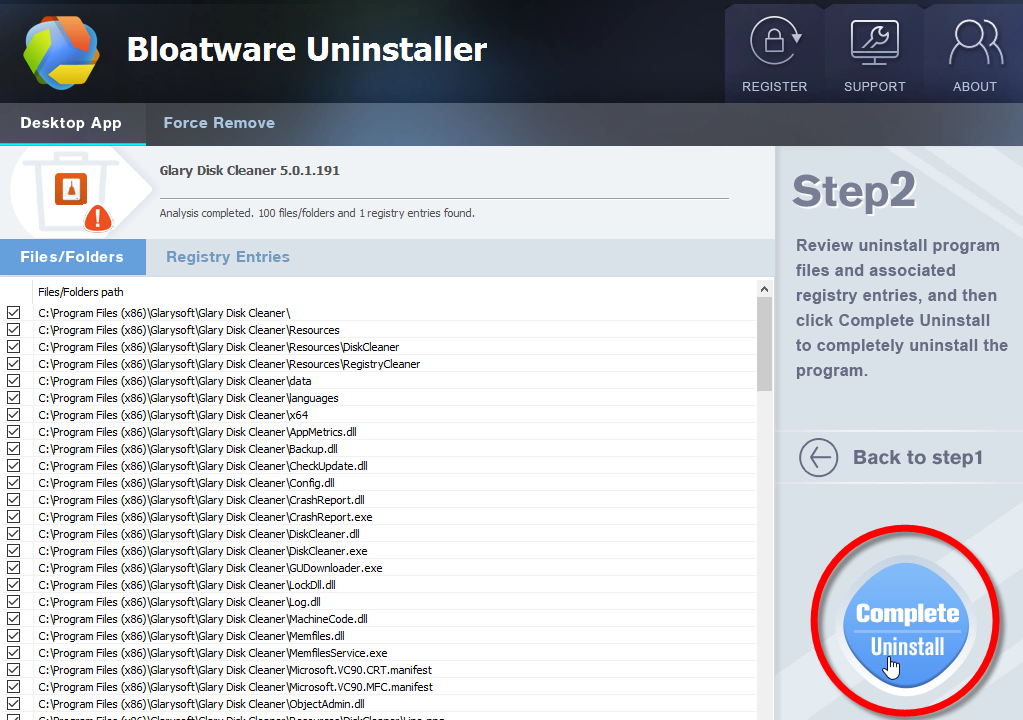
2. Select Glary Disk Cleaner in the list, and click Run Analysis in the lower right corner. It will take just a few seconds.
3. Wait for it to finish scanning all the files, and click Complete Uninstall in the lower right corner to delete the files listed.
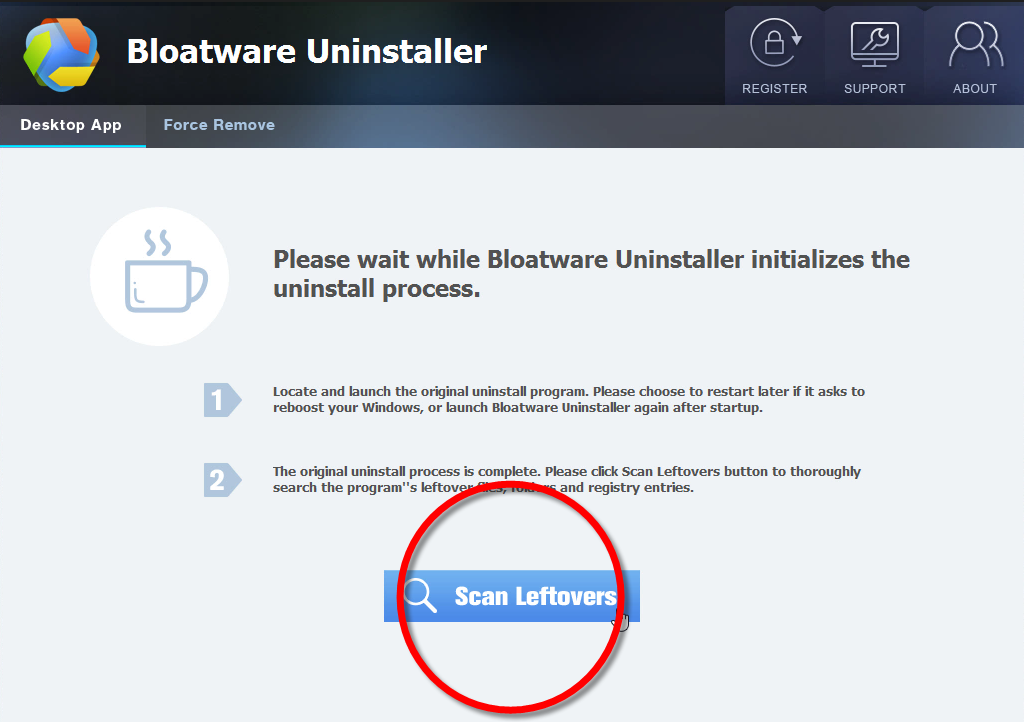
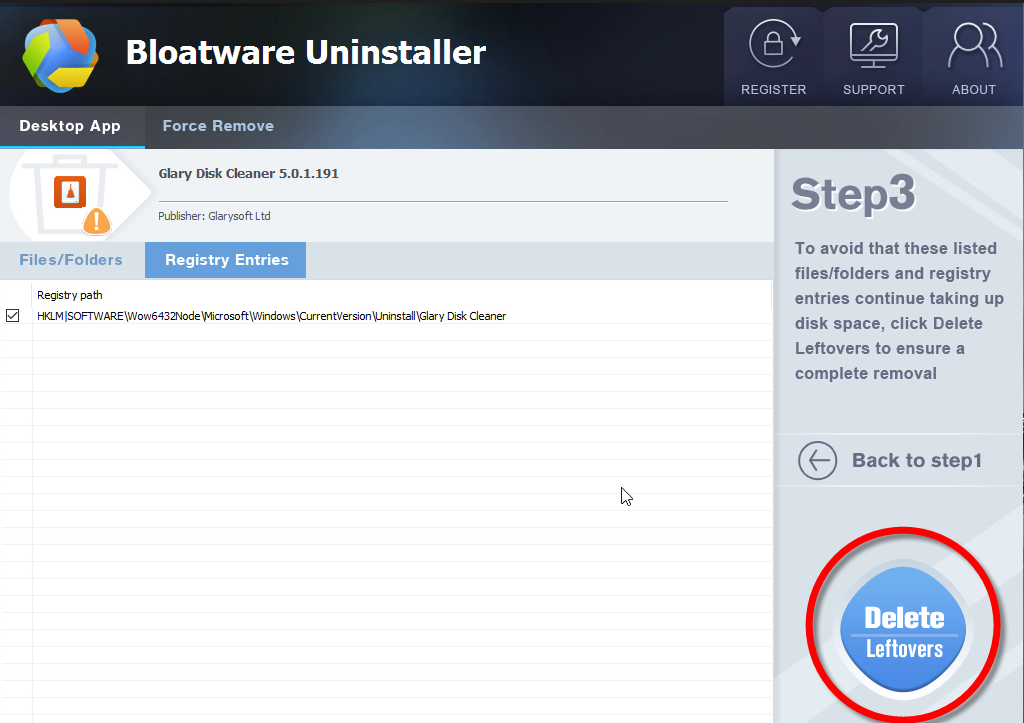
4. Follow the prompts to move on, click Scan Leftovers, and click Delete Leftovers in the lower right corner to delete the leftovers listed.
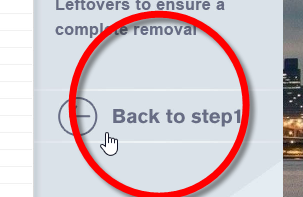
5. Click Back to step1 to check the currently installed programs, see if Glary Disk Cleaner has been removed. For any question you don’t want to ask or problem you encounter, reach their customer service for immediate assistance.
If you ever want an alternative to Glary Disk Cleaner, the above helper I just recommended can a good choice. It does not take much disk space and will not pushes notifications or alerts anytime. You can just click its update in the upper-right corner to check for the latest version.
Which method you like the most? If you have any better solutions to remove Glary Disk Cleaner, feel free to share here by leaving a comment below.
- Utilities & Operating Systems
- 13 Dec 2019