How to Completely, Quickly Remove Google Update Helper?
If you’re exactly one of those how have no idea how to effectively remove Google Update Helper in Windows, you’ll find useful instructions along with the program’s information on this page.

Google Update Helper is used to periodically check for updates. It sends information like version number, operating system, language as well as other details back to Google servers. It runs in the background of the system and automatically starts up when your computer boots, so that it can check for updates and download and install them for you.

Remove Google Update Helper with an All-purpose Tool
Using Bloatware Uninstaller will save you a lot of time, better ensuring a complete removal for the program you wish to remove.
Specific procedures of how to remove Google Update Helper:
1. Click any of the blue download buttons on this page or visit the homepage to download Bloatware Uninstaller.
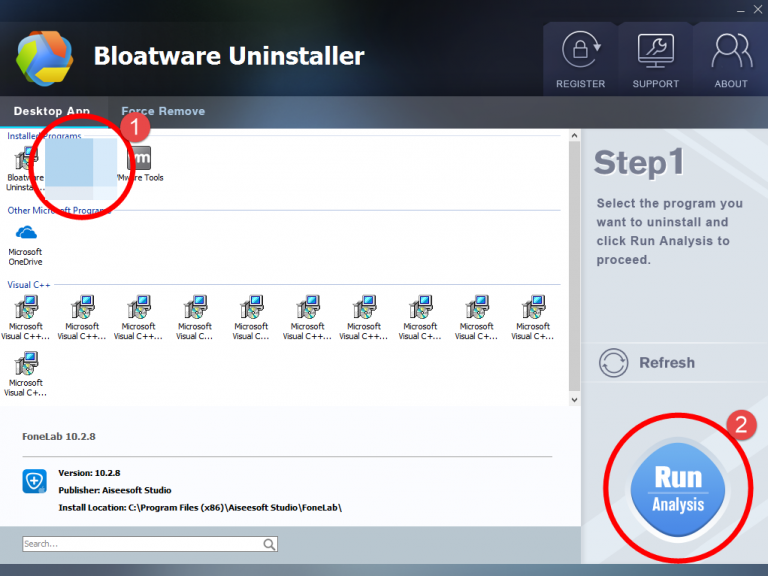
2. Run it, and you can see clearly what programs are installed currently. Choose Google Update Helper and click Run Analysis.
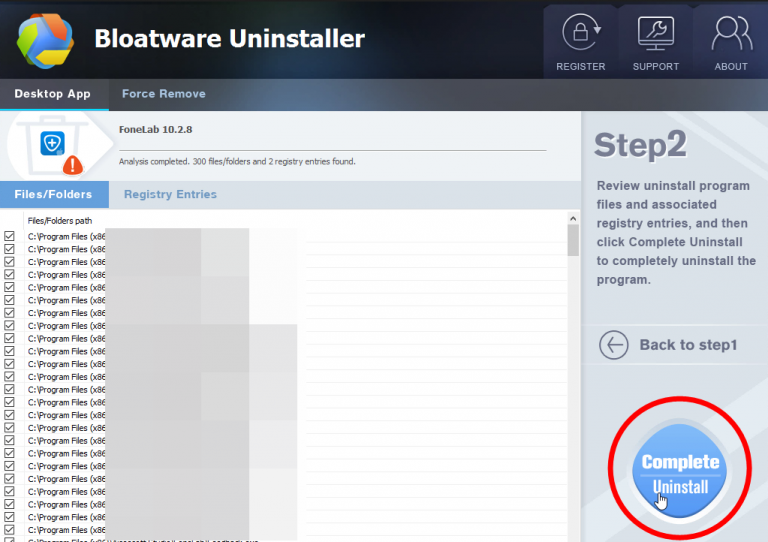
3. Keep all the listed files checked, and click Complete Uninstall on the right.
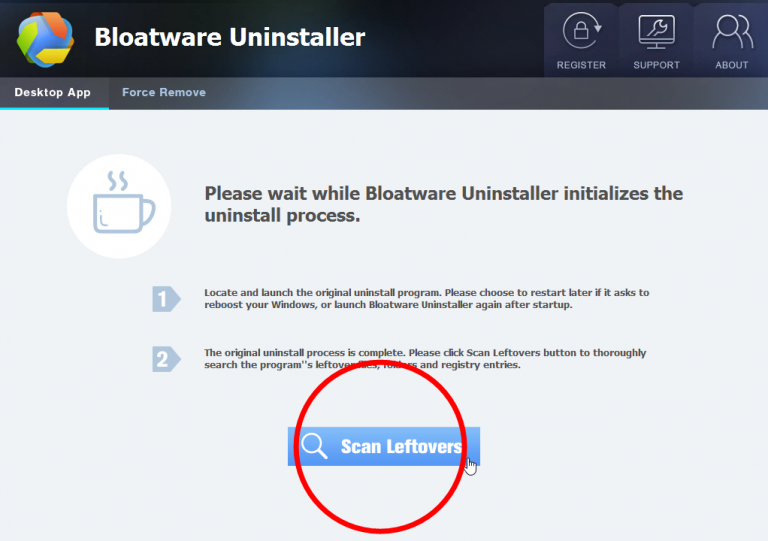
4. It will scan for all the related files and get ready for your next request, during which you may be asked for confirmation of this removal, just click Uninstall to proceed.
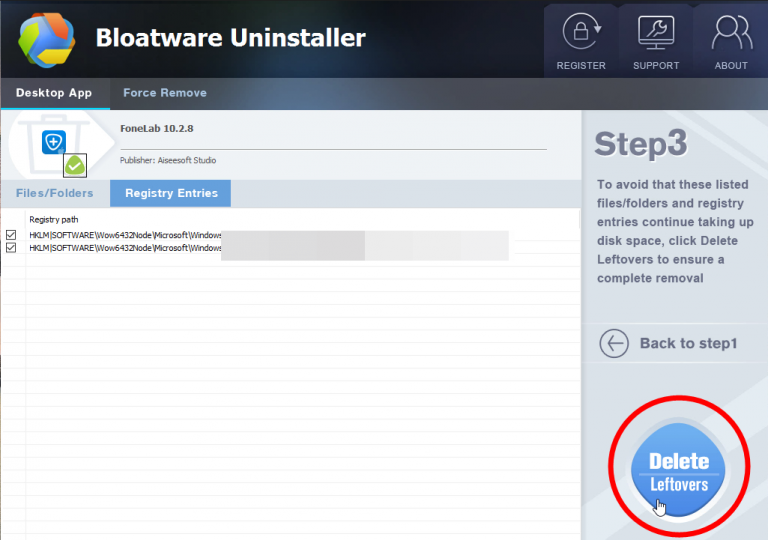
5. Click Scan Leftovers when it turns to blue, then you see the all the vestiges that most users will forget to delete during the manual removal. Click Delete Leftovers to fully remove Google Update Helper.
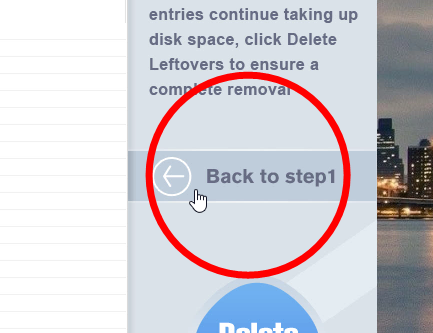
6. Clicking Back to step1 to refresh the list of currently installed programs, and check whether your target has gone.
Here is an example video:
You can perform the same steps to remove other unwanted programs on your computer. I do hope this recommendation can be a better removal solution to you anytime. To learn the manual removal way, continue your reading under the next subtitle.
How to Remove Google Update Helper by Regular Means?
1. Exit the Google Update Helper program.
Most programs will automatically close or ask you to shut them down during the removal, while a few will not. To ensure a complete, smooth removal, better shut down the program as well as the related possesses that are running in the background before activating its built-in uninstaller. You can do this through the System Tray and Task Manager.
2. Locate Google Update Helper in the Programs list.
Windows 8 (Start screen): Click on the Start button, click the Down arrow, find Google Update Helper in the Apps list, right-click on it and select Uninstall at the bottom.
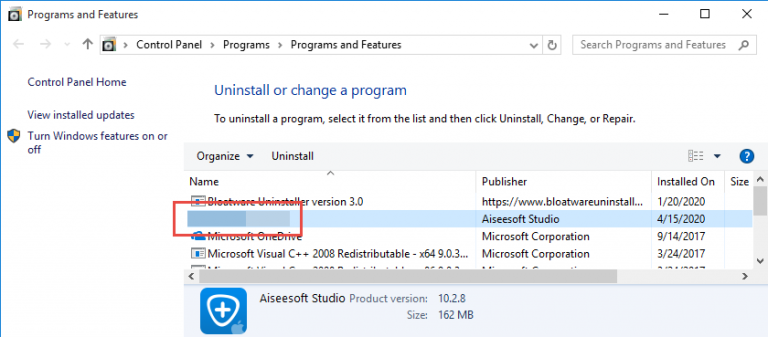
Windows 10 (Start menu): Right-click on the Start button, select Programs and Features, and locate Google Update Helper in the list.
3. Remove Google Update Helper via the Programs List.
Now you should be looking at the Program List, which tells you what programs are installed on your PC, the names of them and their publishers, when they’re installed, and how much disk space they’re taking. Double-click Google Update Helper to activate its built-in uninstaller.
4. Follow the instruction to proceed and confirm the removal.
Once its built-in uninstaller pops up, click Uninstall to provide confirmation. Then wait until the uninstaller finishes its job, and move on to the next steps to search for the related lingering files. If you’re prompted to restart, do it right away or later, no big deal.
5. Remove Google Update Helper via the Registry Editor.
During installation the program registers itself in the system, that’s why you can find their entries in the Registry, it also explains why sometimes you can’t run a program by simply coping the folder from another device. This step is to delete the entries of Google Update Helper. But you should know that using the Registry Editor incorrectly can cause serious issues and may result in an inoperable operating system. So don’t delete anything wrong.
Windows 8 (Start screen): Press and hold the Windows key + C to open the Charms, select Search, type “regedit” in the field, and click the result to open the Registry Editor. Then on the navigator click Edit > Find, enter “Google Update Helper” to search for related leftovers to delete.
Windows 10 (Start menu): Execute “regedit” in the search input field on the taskbar to open the Registry Editor. Then on the navigator click Edit > Find, enter “Google Update Helper” to search for related leftovers to delete.
6. Restart the computer.
Do you have any questions about how to remove Google Update Helper? Write them below so that we get to know what we might have missed, and how to make it better for users to read.
- How To
- 12 Aug 2020