How to Remove TeraByte Drive Image Backup and Restore Suite?
Start your trip to learn how to completely remove TeraByte Drive Image Backup and Restore Suite.


What is TeraByte Drive Image Backup and Restore Suite
TeraByte Driver Image Backup and Restore Suite is a disk imaging software package that protects all your data across multiple platforms. It includes the time-tested components image for Windows, Linus, DOS and the OSD Tool Suite. Here are some details:
- Publisher: TeraByte Unlimited
- Latest version: 3.36
- Size: 143.13MB
- Official site: http://www.terabyteunlimited.com
- Location: X:\Program Files\TeraByte Unlimited
How to Manually Remove TeraByte Drive Image Backup and Restore Suite?
1. Shut down all the processes related to TeraByte. Press and hold continuously on Ctrl + Alt + Del to open the Task Manager. In the Process tab, select your target, and click on “End process”.
2. Open the Program List. Also remove the related programs. To make sure the removal is complete, don’t forget to choose to “Hide Icon Option”. How to do it:
Windows 7: Click on the “Start” button in the lower-left corner of your screen, select “Control Panel”.
Windows 8: Right-click on the “Start” button in the lower-left of your screen, select “Control Panel”.
Windows 10: Right-click on the “Start” button in the lower-left of your screen, select “Programs and Features”.
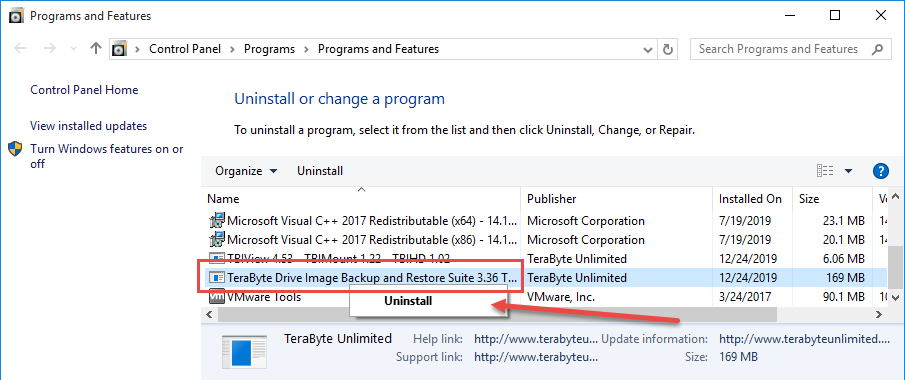
3. Remove TeraByte Drive Image Backup and Restore Suite from the program list. The list of currently installed programs will be presented, find and double-click the TeraByte Drive Image Backup and Restore Suite Center item to activate its default uninstall wizard.
4. Follow the wizard prompts to proceed with the removal. When this is over, don’t rush to reboot your computer. It hasn’t done yet.

5. Open the Windows Registry Editor.
Windows 7: Click on the “Start” button in the lower-left corner of your screen, type “regedit” in the search box, and press “Enter” on your keyboard.
Windows 8: Hover your mouse cursor in the lower-right of your screen, a charms bar will show. > Select “Search”, type “regedit” in the box, then press “Enter” on your keyboard.
Windows 10: Click the “Start” button, type “regedit” in the search box and select “regedit” from the results.
6. Remove the entries/keys of TeraByte Drive Image Backup and Restore Suite Center from Windows Registry. Locate HKEY_CURRENT_USER/software/TeraByte Unlimited/, right-click on the folder and select “Delete” to completely remove TeraByte Drive Image Backup and Restore Suite Center. But DO NOT delete anything else.
7. Restart your computer to complete the cleaning job. Following all the above steps will make sure to remove TeraByte Drive Image Backup and Restore Suite Center from your system.
8. Check if the following data have been removed:
C:\Program Files (x86)\TeraByte Unlimited or C:\Program Files\TeraByte Unlimited C:\ProgramData\BlueStacks
C:\ProgramData\BlueStacksSetup
You can also check your system tray or re-open the Control Panel and Windows Registry to see whether the program has gone.
10. If the re-installation is needed, click here for download.
Simpler Way to Remove TeraByte Drive Image Backup and Restore Suite
Through the previous instruction, you have learned the program entries require manual deletion, or they won’t go away but stay there taking your hard drive space. To effectively remove TeraByte Drive Image Backup and Restore Suite Center, if all you need is but a time-saving path to finish all the steps, do it this way instead:
1. Click the green Download button to install Bloatware Uninstaller.
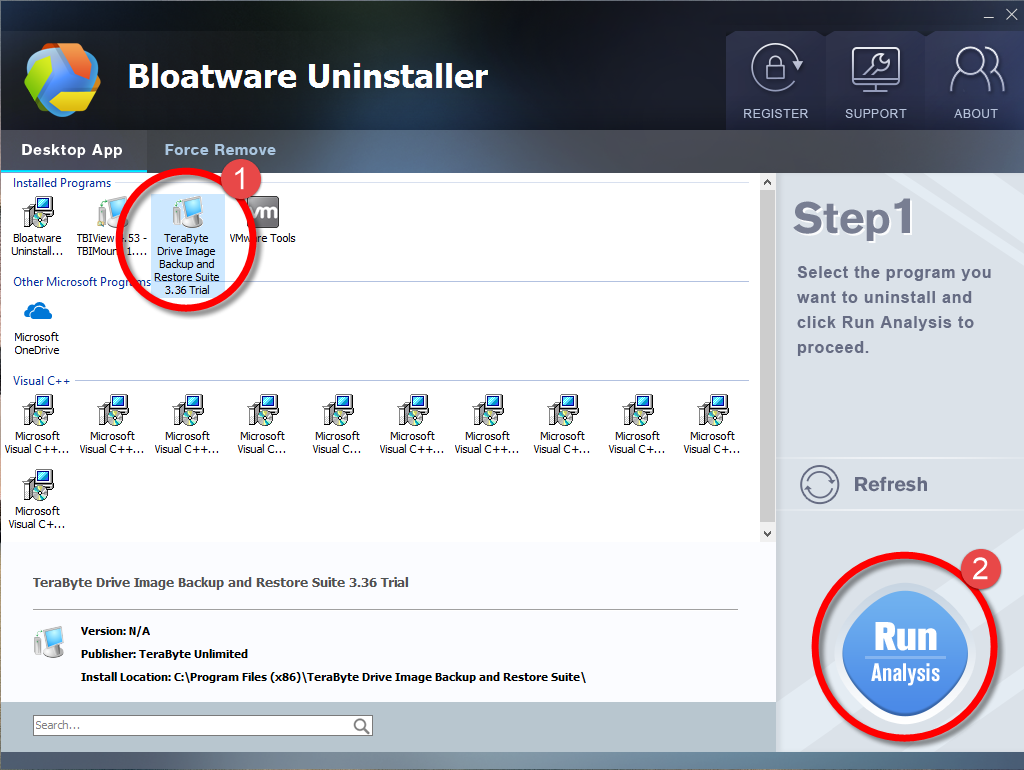
2. Run it and you will see the list of all the programs currently installed on your machine > Locate the TeraByte Drive Image Backup and Restore Suite icon, select it and click on the green Run Analysis button.
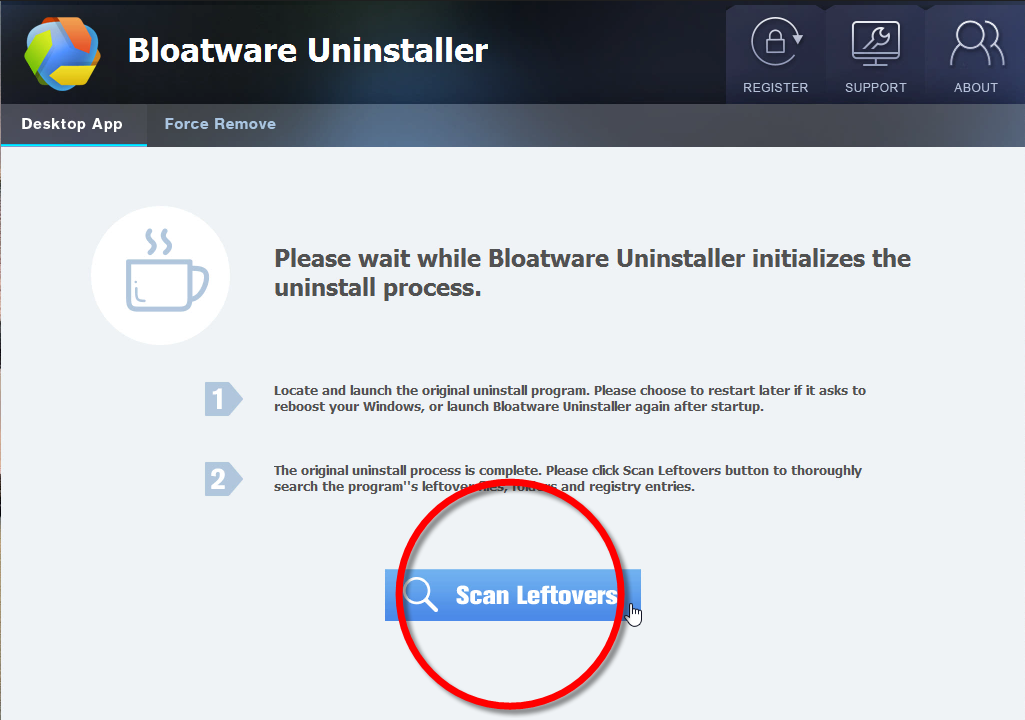
3. Keep all items displayed in the new list ticked, click the Complete Uninstall button.

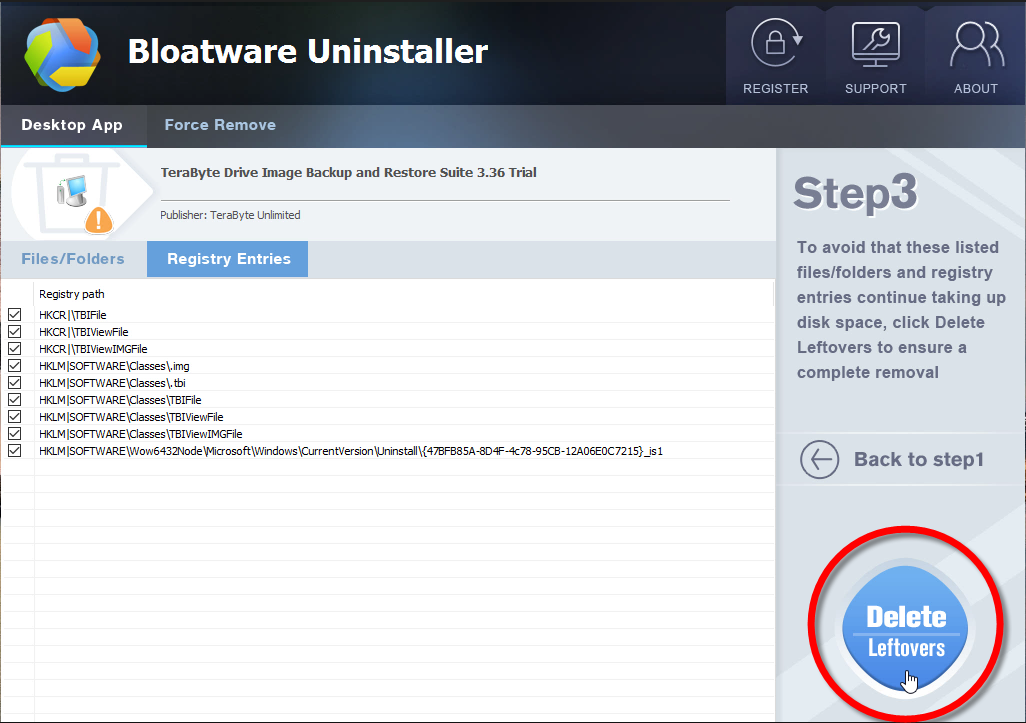
4. After a few seconds, it will give you the option to Scan Leftovers (cleaning out the keys from Windows Registry), click it.
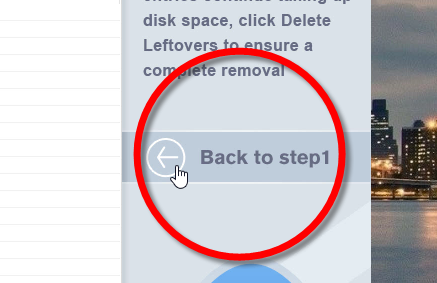
5. At last, click the Delete Leftovers button to completely remove TeraByte Drive Image Backup and Restore Suite.
6. Click Back to Step1 to fresh the program list, so that you can check whether your target has been eliminated. After the removal is complete, you can perform the same steps to uninstall other programs you don’t need on your PC.
How it works to remove TeraByte Drive Image Backup and Restore Suite Center:
Possible Unwanted Consequences Due to Incorrect Deletion
- Removal failure
- Re-installation failure
- Intractable registry entries (leftovers)
- Screen freeze or system crash
Now you know where those errors come from. Next time facing such problems, don’t forget to seek help from us : )
In the very end of this article, if you have any questions about how to remove TeraByte Drive Image Backup and Restore Suite Center, or any experiences that you want to share, leave your comment or send us messages. You will get proper answers as soon as we figure things out.
It is always a good habit to termly clean out the junks and things you don’t need for your machine. You can imagine how hard it is for a computer to run fast with so many programs installed. Time is the most valuable resource in the world, and efficiency is what people pursue for accomplishing business. Don’t let the meaningless drag you down.
- Utilities & Operating Systems
- 27 Dec 2019