A Few Steps to Efficiently, Fully Remove Vivaldi on Your PC
If you’re still trying to figure out how to correctly remove Vivaldi in Windows, why not directly follow our removal instructions here?
Vivaldi is a web browser built on Chromium, aiming at advanced users, especially those looking for the features retired with the old Opera before it become a fork of Chromium. It has a relatively different user interface, and contains typical features and general layout of some other browsers like Google Chrome and Mozilla Firefox. Well, it is your choice which browser to use. Under the following subtitles you can find solutions to remove Vivaldi from your PC.

Detailed Instructions to Remove Vivaldi in Windows 7/8/10
Step 1. Stop the Vivaldi processes before you actually uninstall Vivaldi.
First of all, you need to deactivate the its process: Right-click the Windows taskbar and select “Task Manager”. See if there is any process related to Vivaldi, disable it/them by selecting it/them and click End Process.
How to disable a program’s startup: Control Panel – Administrative Tools – Services – right-click on the program you wish to disable – Properties – Stop. Then click on the “Startup type” drop-down menu, and select “Disabled.”
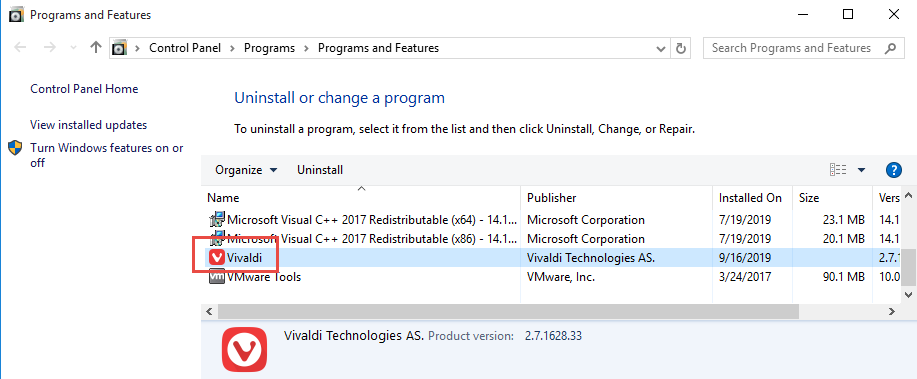
Step 2. Remove Vivaldi from Control Panel
Most of the time, we can remove the programs we choose through the Add/Remove Program function, which is a built-in art of Windows operating system. To activate it, we need to access Control Panel first.
Windows 7:
Click on the Start button in the bottom left corner of your screen, move your mouse pointer to the Control Panel and click it. Find the Uninstall a program item under the Programs section and select it. A new window will pop up with the list of current program installed on your machine, find Vivaldi and click the above Uninstall button (or double-click it) to start the removal. Follow the prompt messages to proceed and wait for a while until the program finishes the part.
Windows 8:
In the bottom-left of your screen, right-click the Start button, and select Programs and Features. Double-click Vivaldi to start the removal. Follow the prompt messages to proceed and wait until the program completes the part.
Windows 10:
In the bottom-left of your screen, right-click the Start button, and select Programs and Features. Double-click Vivaldi to start the removal. Follow the prompt messages to proceed and wait until the program completes the part.
Step 3. Remove Vivaldi and delete its related files from Registry Editor
The Windows Registry is a database, where the system and its programs save their settings. So it contains hundreds of thousands of keys, some of which may be slightly outdated – like you’ve removed a program and it left some entries behind, or perhaps there’s a file extension without any associated program. But before doing this, make sure there is no other programs related to Vivaldi.
Windows 7:
Click on Start button in the lower left corner, type “regedit” in the menu search box and press Enter on your keyboard. The Registry Editor will be opened with another window, on the navigator click Edit > Find…, enter “Vivaldi” to search for possible remaining files, and delete them to completely remove Vivaldi.
Windows 8:
Press and hold Windows key + C on your keyboard to open the charms bar. Select Search, type “regedit” in the box, and press Enter key. The Registry Editor will be opened with another window, on the navigator click Edit > Find…, and enter “Vivaldi” to search for possible remaining files, and delete them to completely remove Vivaldi.
Windows 10:
On the taskbar there is a Search Box, enter “regedit” to open the Registry Editor. On the navigator click Edit > Find…, and enter “Vivaldi” to search for possible remaining files, and delete them to completely remove Vivaldi.

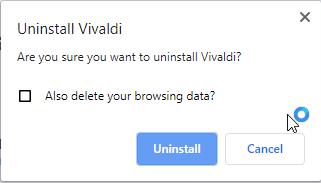
Step 4. Confirm the removal.
Follow the prompts of the built-in uninstall wizard to proceed with the removal. When you are provided with the option to “Also delete your browsing data”, check it if you don’t plan to reinstall it later, then click Uninstall. Otherwise just leave it unchecked and click Uninstall.
Step 5. Restart your PC to take effect.
That’s all for the regular means instruction. Continue your browsing below if you’re curious whether there is a simpler method.
Easy Solution to Completely Remove Vivaldi in Windows
What if someday, you come across another troublesome program or potentially unwanted programs that may require you to take different steps to remove it? We hereby recommend this tool for your choice. Install it on your computer and you wouldn’t be worried about any external invasion or vestiges that are hard to track down. Firstly, let’s see how to remove Vivaldi with it:
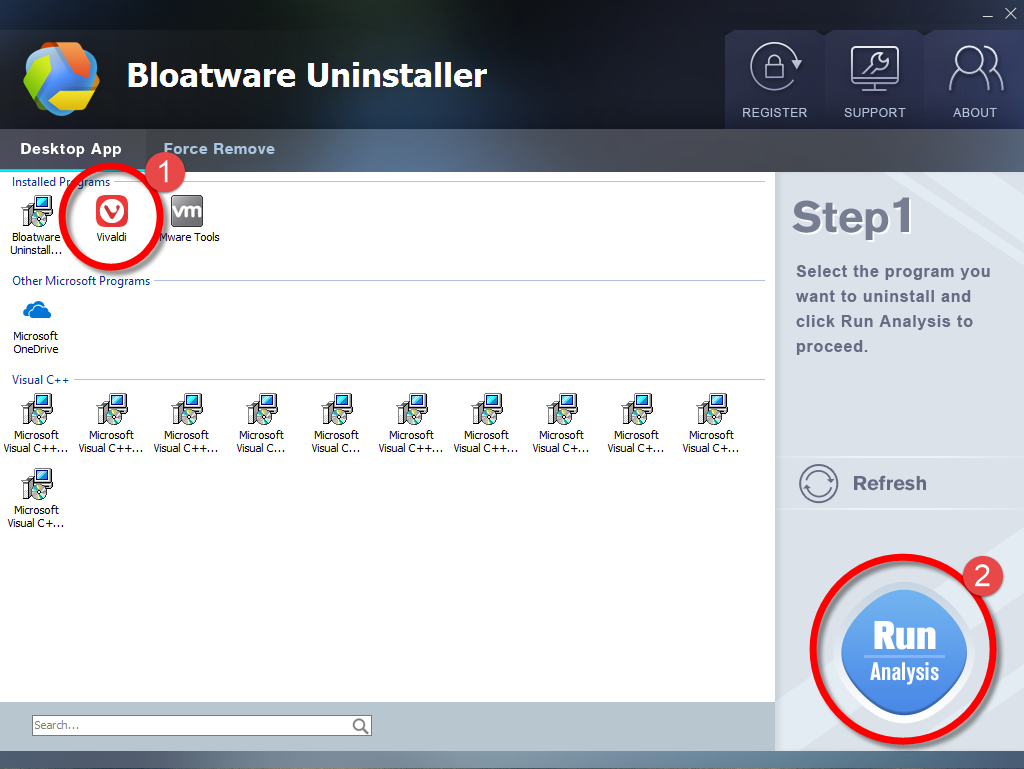
Step 1. Download, install and launch Bloatware Uninstaller from your desktop.
Step 2. Select Vivaldi in the list it presents, and click Run Analysis in the lower right corner.
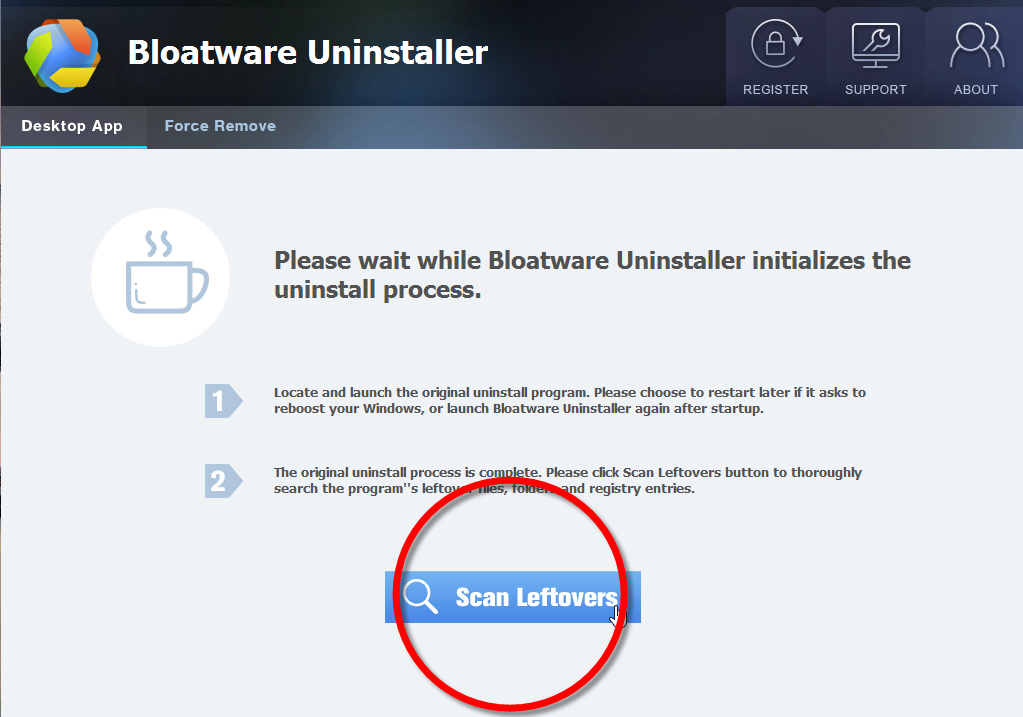
Step 3. Wait for it to finish scanning all the files, and click Complete Uninstall in the lower right corner to delete the files listed.

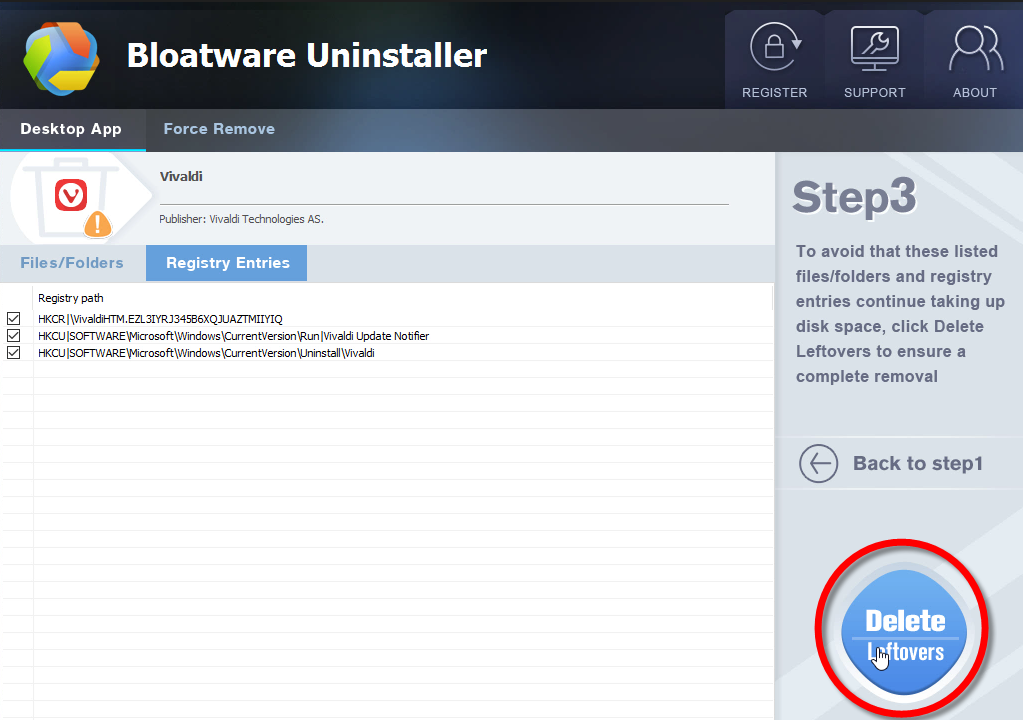
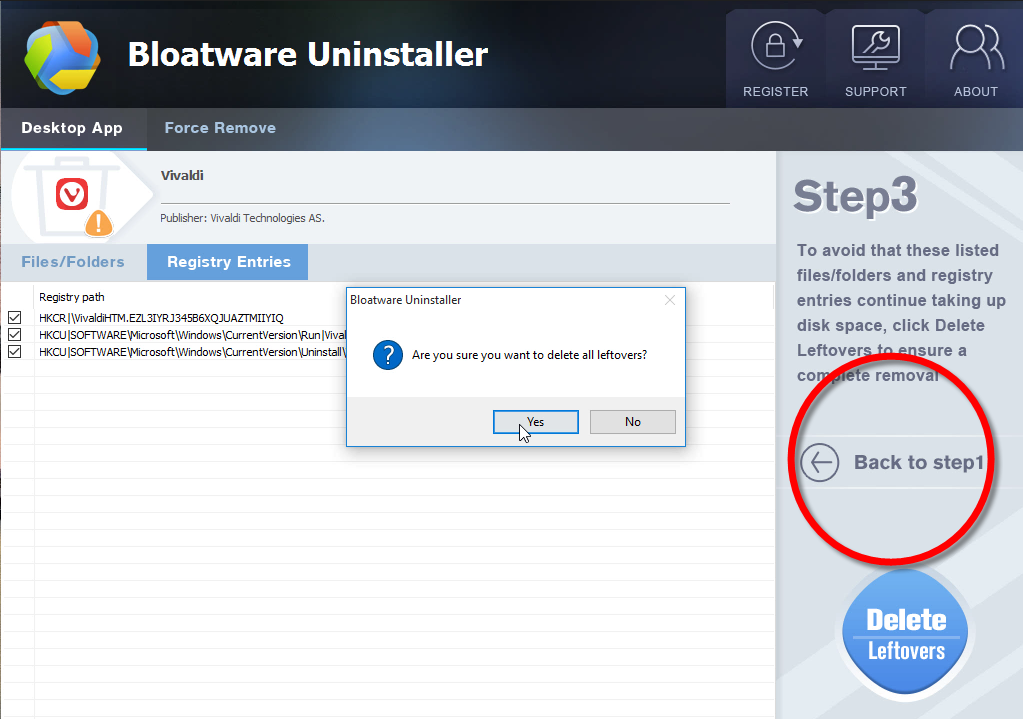
Step 4. Follow the prompts to move on, click Scan Leftovers when it turns to blue, and click Delete Leftovers in the lower right corner to delete the leftovers listed.
Step 5. Click Back to step1 to check the currently installed programs, see if Vivaldi has been successfully removed.
Video Demonstration on How to Quickly Remove Vivaldi
Any feedback you want to let us know? Leave comments below.
- Utilities & Operating Systems
- 20 Sep 2019