Remove Webroot SecureAnywhere AntiVirus 2017 Completely From PC (Removal Guides)
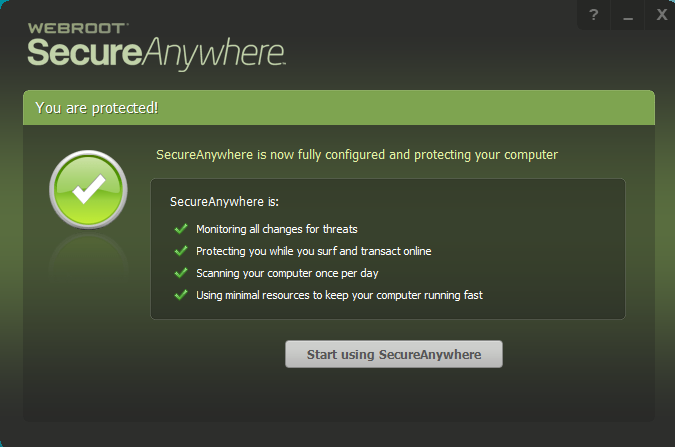
“I had a trial use of Webroot SecureAnywhere AntiVirus and cannot uninstall and I can’t afford it right now. Much worse, I’ve tried the command line removal in safe mode and still cannot remove.” “What can I do with it to get rid of it my computer?”
This blog will provide you how to completely remove Webroot SecureAnywhere AntiVirus 2017 from Windows, so take care to read it over if you have no idea to eliminate unwanted antivirus in PC.
Webroot SecureAnywhere provides full protection for your PC safety online or data stored, however, it’s not an easy thing as you have to remove it from computer, some issues always occurred during uninstallation like many users experience:
- Webroot says “Uninstall failed”
- Webroot AntiVirus refuses to be removed from computer
- Webroot AntiVirus files and registry cannot cleaned thoroughly with the app removal
- Can’t installed other antivirus apps because of the exist of Webroot AntiVirus
But luckily enough, don’t worry it anymore, this post will surely show you the full tutorial of removing Webroot SecureAnywhere AntiVirus 2017 in specific steps.
Efficient & Fast Method to Remove Webroot SecureAnywhere AntiVirus 2017
First end running of Webroot SecureAnywhere AntiVirus 2017
No matter you remove Webroot SecureAnywhere AntiVirus from Control Panel or in Remover tool, you’d better exit the running Webroot firstly if possible just in order to make sure the smooth during Webroot SecureAnywhere AntiVirus 2017 removal,
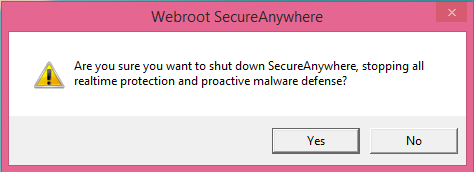
1. Go to the taskbar on the lower right corner>> click the triangle icon to open the hidden apps >> select Webroot SecureAnywhere AntiVirus >> right click to choose “Shut Down Protection”.

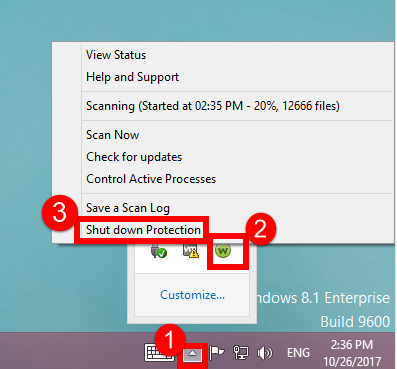
2. Click the taskbar >> choose Task Manager >> select the related processes with Webroot SecureAnywhere AntiVirus >> click End Task.

Then use convenient method to completely remove Webroot SecureAnywhere AntiVirus 2017 from Windows 7/8/8.1/10
(After successful installation and register of Bloatware Uninstaller > Launch it.)
Start to use it to remove Webroot SecureAnywhere AntiVirus 2017 completely from PC.
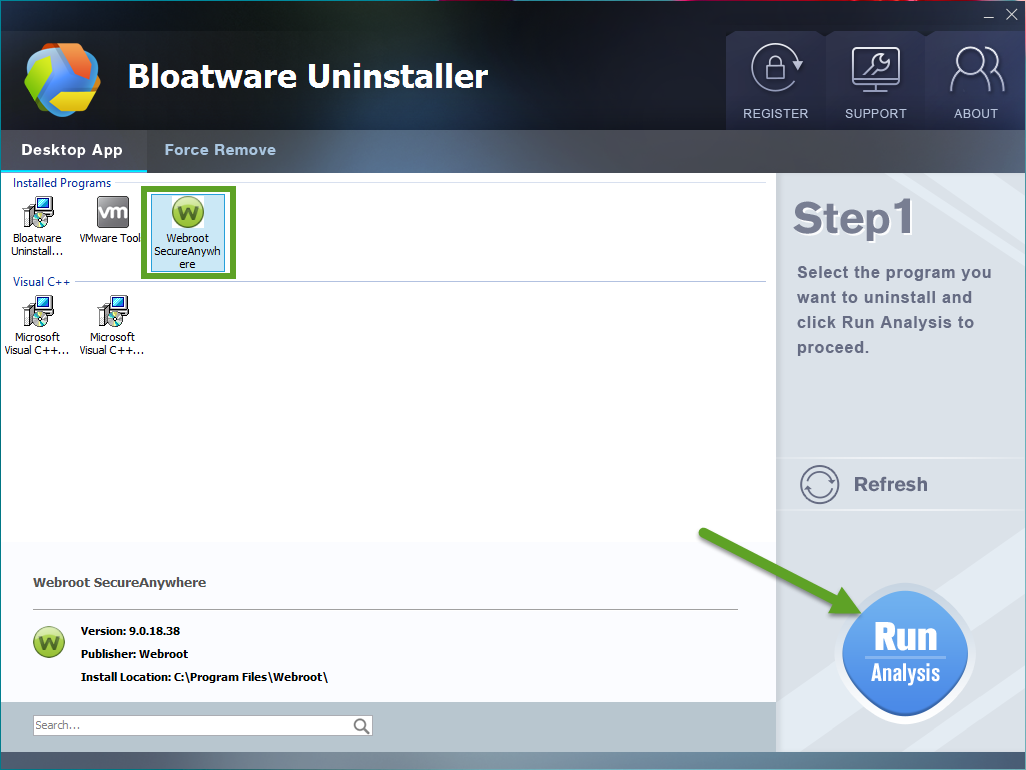
Step 1. Select the target: Run the removal tool, select the target “Webroot SecureAnywhere AntiVirus 2017”, then click the button “Run Analyze”;
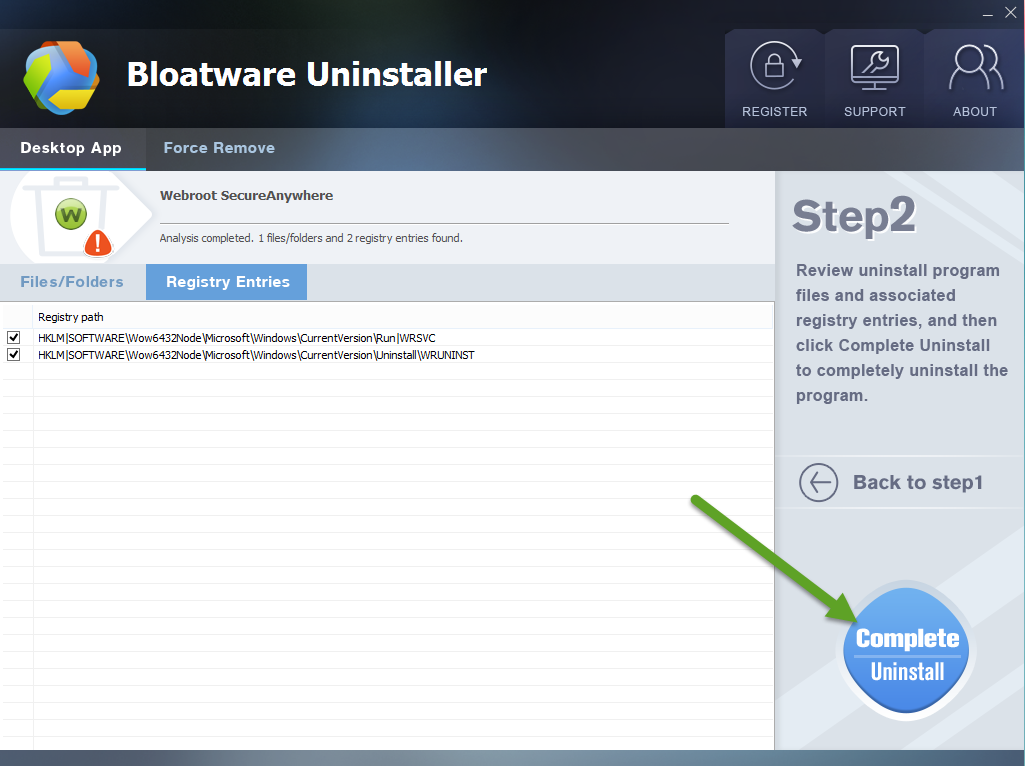
Step 2. Scan related components: Easily click the button Complete Uninstall to conduct the regular removal of scanning files/folders of Webroot SecureAnywhere AntiVirus 2017. Then click Yes to delete all leftovers scanned in uninstaller;
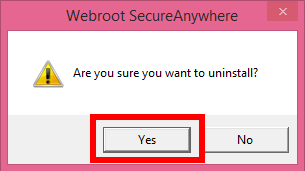
Just allow the uninstall process to run by clicking “Yes“.
Step 3. Delete leftovers: A few minutes later by getting through improvement by Webroot SecureAnywhere AntiVirus 2017, and then easily click on the button of “Delete Leftovers”, click Yes to confirm your removal.

Spend a few minutes to watch the full process of uninstalling Webroot SecureAnywhere AntiVirus 2017 with BU from PC bellow:
Congratulations, Webroot SecureAnywhere AntiVirus 2017 has been successfully removed from your PC altogether with its leftovers, including 1200 files/folders and 306 registry entries are gone for good.
Manual Way to Remove Webroot SecureAnywhere AntiVirus 2017
Or you can do like many of them, to use manual way to uninstall things in PC via Control Panel/ Programs and Features, but take care of it, because some users have met more problem when trying to remove Webroot SecureAnywhere AntiVirus 2017, like “I’ve tried the solution found on this forum, problem is, I don’t have it on my control panel nor a “uninstall” shortcut… can you guys help me?”, “I can see that Webroot SecureAnywhere is in the list, I clicked uninstall but nothing happens.”
But anyway, let’s get it start:
1. Reboot your computer system into Safe Mode
Better reset your computer into Safe Mode and use the Administrator account to run the system before performing Webroot Antivirus removal.
2. Remove Webroot AntiVirus from Programs and Features:
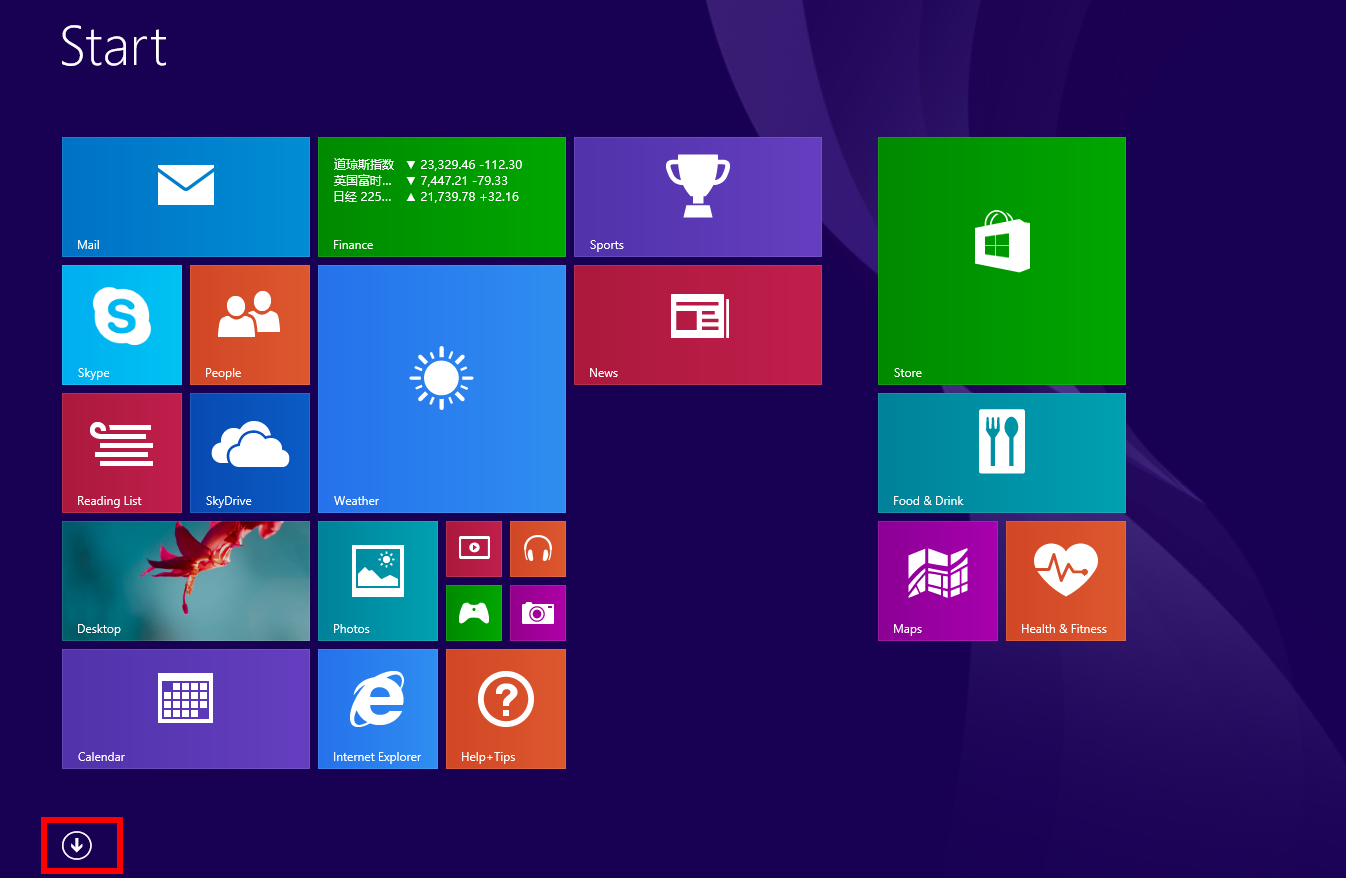
- Click the Menu bar, then click down arrow;
- Select Webroot SecureAnywhere AntiVirus 2017 icon, right click it;
- Choose Uninstall button;

- Then you move to Programs and Features window;
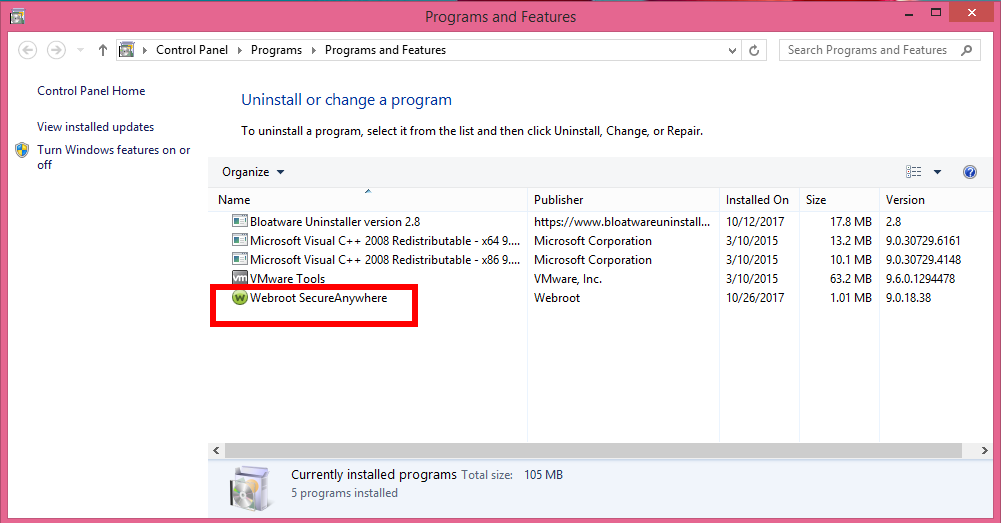
- You can also launch Programs and Features window from Menu bar straightly;
- Select target Webroot SecureAnywhere AntiVirus 2017 icon;
- Choose the Uninstall /Change or right click choose Uninstall, are the same option;
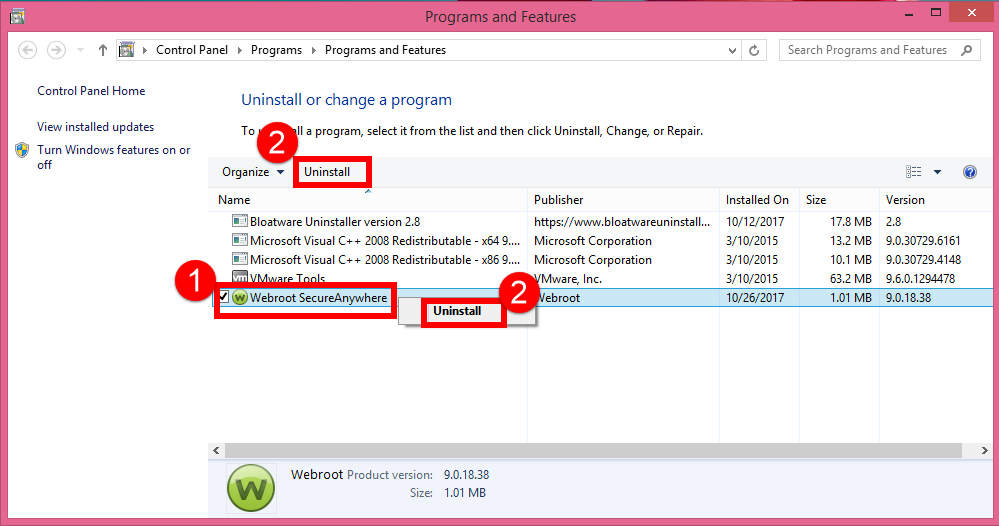
- Allow the uninstall process to run by clicking “Yes“;

- Type the verification code to confirm removal;
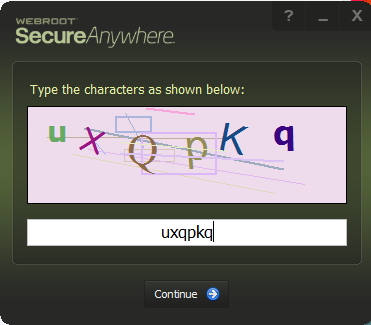
Now that you removed Webroot SecureAnywhere, you have to reboot your computer before the changes take place. Better now than later.
3. Delete its related files/folders and registry entries
- Go the Star Menu;
- Hit Run;
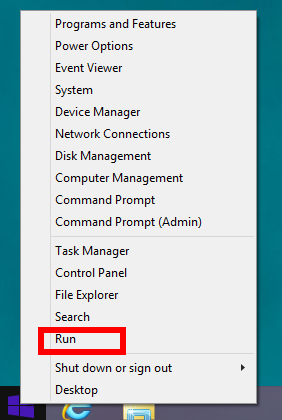
- Type “regedit” in the Open box, hit OK

- Confirm the opening of Registry Editor window;
- Press the shortcuts of Ctrl + F to open the search box;
- Type the program name “Webroot SecureAnywhere AntiVirus 2017 / Webroot / SecureAnywhere” in the box;

- Delete the target file once it has been searched out;
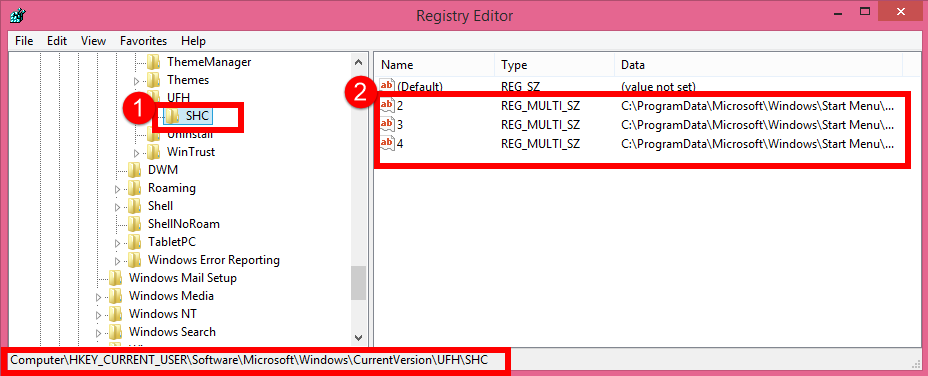
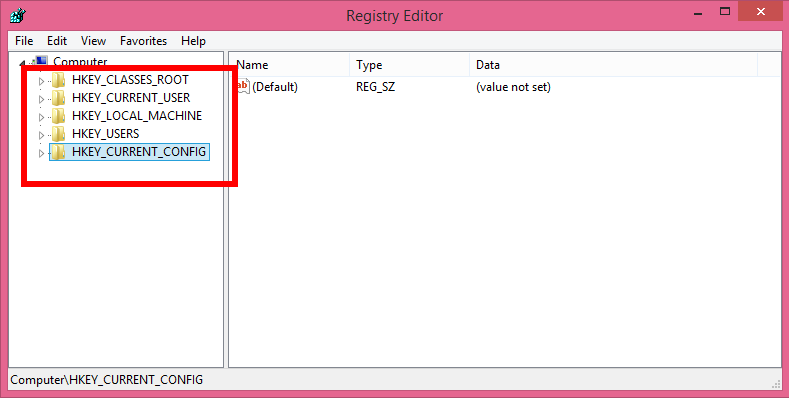
- Repeat the same steps in Searching and deleting registry files in all FIVE folders;
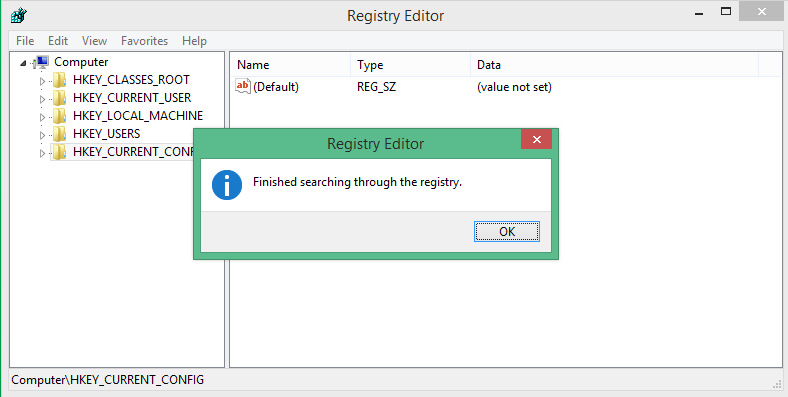
- Finished when the dialog popup saying “finishing searching”;
- Reboot your computer to confirm removal.
Note: You’d better back up registry in your Windows in case you have deleted wrong registry in the process of entries elimination in Webroot SecureAnywhere AntiVirus removal.
Tips: How to back up the registry in Windows
Back up the registry manually
In Windows 8/8.1/10
- From the Start menu, type regedit.exe in the search box, and then press Enter. If you are prompted for an administrator password or for confirmation, type the password or provide confirmation.
- In Registry Editor, locate and click the registry key or subkey that you want to back up.
- Click File > Export.
- In the Export Registry File dialog box, select the location to which you want to save the backup copy, and then type a name for the backup file in the File name field.
- Click Save.
How you learn the point to easily remove Webroot SecureAnywhere AntiVirus 2017 now? Leave the comment bellow to tell us whether it works or not.
- Antivirus Program, Windows Removal
- 27 Oct 2017


