Completely Uninstall Acer Updater From PC, You Might Need This!
“What is the Acer Updater & should I delete it? I keep getting a pop-up for the Acer Updater on my 1410. What exactly does it do & should I just uninstall it? Could you provide some effective way to completely uninstall Acer Updater in one time? Thanks!”

The Acer Updater software checks for critical updates and fixes to keep your system always up-to-date. When new updates are found, Acer Updater downloads and installs the fixes automatically. Acer Updater only checks for selected updates or BIOS versions that are considered critical to your PC.
And the answer is YES, we will provide the helpful solutions to safely remove Acer Updater on PC, just keep reading more details & steps.

Go to Start/Control panel/add remove programs/ & Uninstall Acer Updater
If you don’t need Acer Updater any more or find it useless on your system, then just go to the Start/Control panel/add remove programs / Programs and Feature to uninstall Acer Updater manually. In this way, the computer will negative the default uninstaller to delete unwanted software as you try.
Follow the detailed steps:
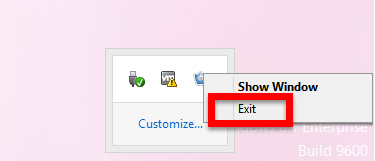
1. End task of Acer Updater
- Right click on the Hidden menu in lower right corner to show the hidden icons >> right click on the icon of Acer Updater to choose Exit.
- Or hold Ctrl + Shift + Esc keys on the keyboard to open Task Manager. Then click on the related process and click End Process (in Windows 7, Vista) or End Task (in Windows 8) button.
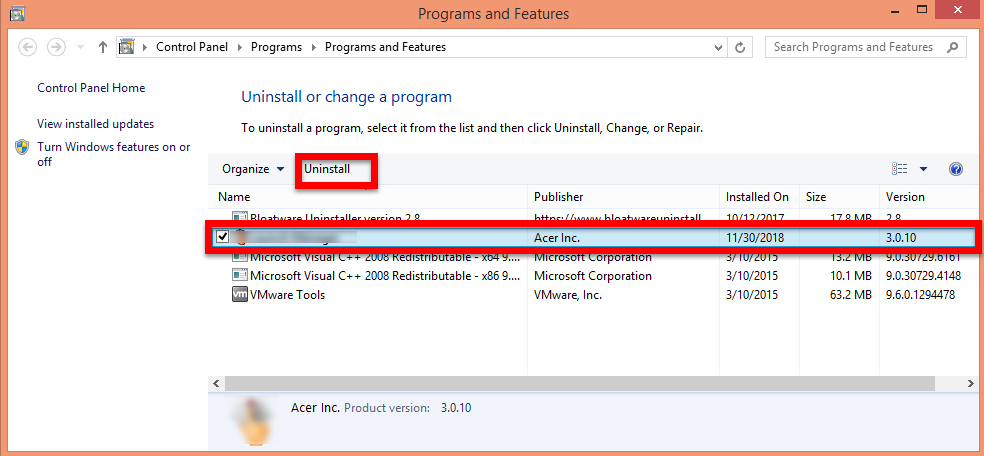
2. Uninstall Acer Updater via Programs and Features.
For Windows 7 Users:
- Click on Start at the bottom left of the screen
- Select Control Panel → Uninstall a program link.
- Find and select Acer Updater in the list, right-click it and select Uninstall.
- Follow the instruction to finish the removal.
- Restart your computer.
For Windows 8 Users:
- Click on Start at the bottom left of the screen
- Select Programs and Features
- Find and select Acer Updater in the list, right-click it and select Uninstall.
- Follow the instruction to finish the removal.
- Restart your computer.
3. Delete the leftovers Files of Acer Updater
Two different leftovers files you should clean up on computer in order to completely uninstall Acer Updater.
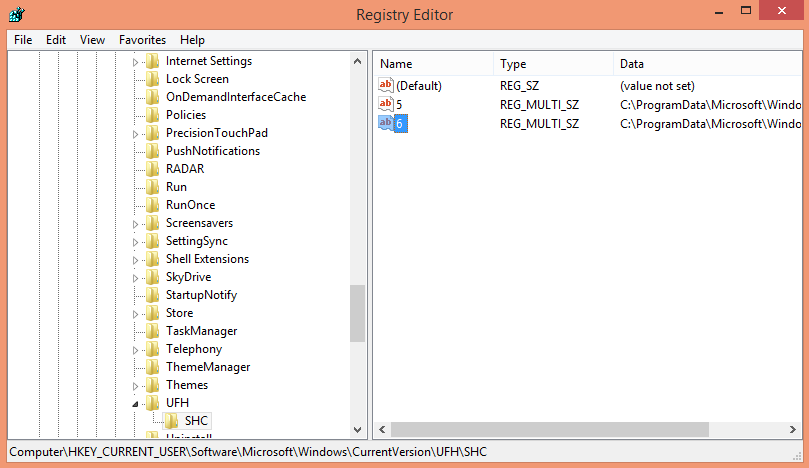
Delete invalid registry entries / values:
- Click Start then select Run,
- Type in regedit in the dialog and click OK,
- Find and delete registry entries of the program, such as:
(HKEY_CURRENT_USER\Software\)
(HKEY_LOCAL_MACHINE\Software\ Acer Updater)
(HKEY_LOCAL_MACHINE\Software\Microsoft\Windows\CurrentVersion\Run\eg ui)
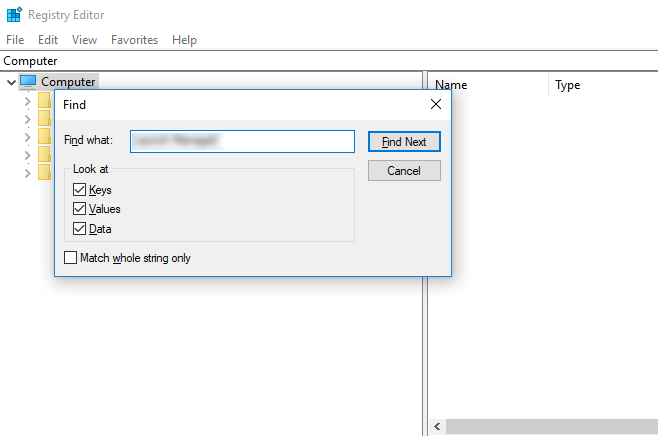
or:
- Type the key word Acer Updater on the search box to begin the searching, once it has showed out, delete it.
Delete leftover files on PC:
- Click on the Start, choose the Control Panel, and double click Folder Options, select “Show Hidden Files and Folders”, then locate the blew folders and delete them directly.
Note: Uninstall error are usually caused when the operating system’s registry contains errors or when certain system files are missing or broken; Uninstall error problems are a sign of a very unhealthy system. Uninstall error are caused in one way or another by misconfigured system files.
So, if you got uninstall error then there is a 94% chance that your computer has registry problems. To avoid that problem, you’d better choose the third party remover to completely uninstall Acer Updater safely.
Go to Bloatwareuninstaller.com & Uninstall Acer Updater
This website offer the effective & helpful removal tool to safely uninstall Acer Updater in Windows, all you need to do is to follow the instruction below to quickly remove it step by step.
1. Download & register successfully of Bloatware uninstaller
2. Follow the detailed steps:
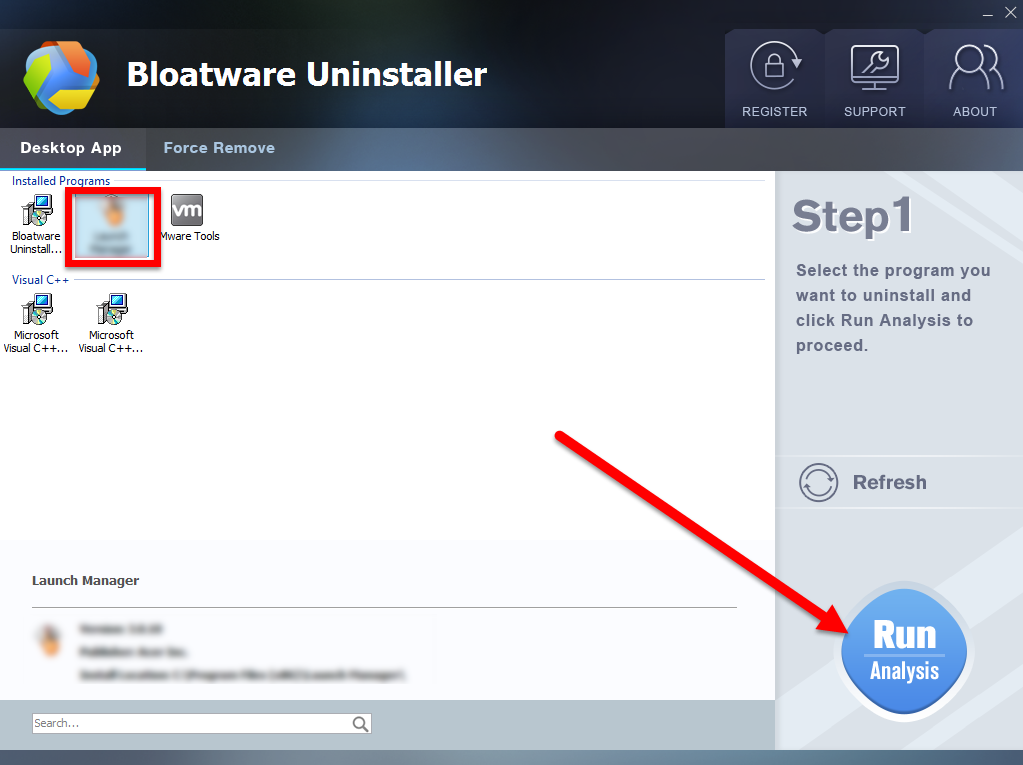
Step 1
- Select Acer Updater on the interface, and then click the button “Run Analysis”;
Step 2
- lick on “Complete Uninstall” after all the components are scanned out;
- Click Next, and then Remove in the pop-up dialog and follow the prompts to complete the removal until it Finish;
- Click on Scan Leftovers to conduct a full scan for the program leftover after it lights up.
Step 3
- Click on Delete Leftovers and then Yes in the pop-up confirmation dialog;
- After all the leftovers have been removed completely, click OK to end the process; Back to Step 1, you will find Acer Updater is gone, as well all the leftovers;
See, it is the whole process steps to uninstall Acer Updater using automated remover on a Windows PC, isn’t easy to operate enough for you? Now, download the tool and begin your fast removal of any unwanted app.
Why is my Acer Updater not finding updates?
If your Updater utility does not find updates automatically, even when these updates are available on the Acer website, you may need to manually update your current version of Acer Updater by following the steps below:
- Download the latest version of Acer Updater.
- Click the Download link for the file you want to download.
- Double-click the downloaded file and follow the on screen instructions to install the updated
If issue persists contact Acer support for better assistance.
- Acer Software
- 18 Dec 2018