Cannot Uninstall ASUS USB Charger Plus? Look for Proper Solution Right Here!
How to uninstall ASUS USB Charger Plus?
–“I saw another topic about this issue but nothing in that topic was helpful so I will ask the same question here. How do I uninstall ASUS USB Charger Plus? It says that it’s not compatible with Windows 8. I have tried to uninstall it through the control-panel, but it still doesn’t work to uninstall the ASUS USB Charger Plus. so please does anyone have any suggestions how I can uninstall it?”

What is ASUS USB Charger Plus
ASUS USB Charger Plus is a program developed for the Windows platform that lets users charges their USB devices such as music players, tablets and smart phones while their computer is in Sleep Mode. The program also lets the USB slot draw more power allowing devices to charge much faster. This is a preinstalled software that is found on certain computers manufactured by ASUS, which is a Chinese personal computer vendor that manufactures everything from desktops and laptops to mobile phones, monitors, optical storage devices, and graphics cards.
Now that some people have problem to uninstall ASUS USB Charger Plus from computer, so this page works for giving the solutions to compete remove it on PC, if you are still have no idea to do that, keep reading & learn more.
How to uninstall ASUS USB Charger Plus manually
First, let’s try the manual approach to uninstall ASUS USB Charger Plus from Windows PC, most of the software in Windows can be removed by the Control panel, so try it first.
1. Make sure you have logged in the Save Mode of the computer
- Run your PC in Safe Mode: Restart your PC and keep pressing F8 key before your Windows loads. Select Safe Mode with Networking and hit Enter key.
2. Log in your computer system as administrator
3. End all processes before uninstalling it
- Right click on the Hidden menu in lower right corner to show the hidden icons >> right click on the icon of ASUS USB Charger Plus to choose Exit.
- Or hold Ctrl + Shift + Esc keys on the keyboard to open Task Manager. Then click on the related process and click End Process (in Windows 7, Vista) or End Task (in Windows 8) button.

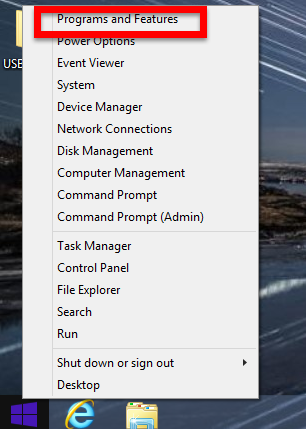
4. Uninstall ASUS USB Charger Plus on Programs and Feature
In Windows 7 and Vista:
- Click Start menu and click Control Panel
- Select View by Category and click Uninstall a program
- Look for ASUS USB Charger Plus in the list of available programs.

- Click Uninstall
- Click Yes to run Windows default uninstaller, and click OK to finish the auto uninstall process.

In Windows 8 or later:
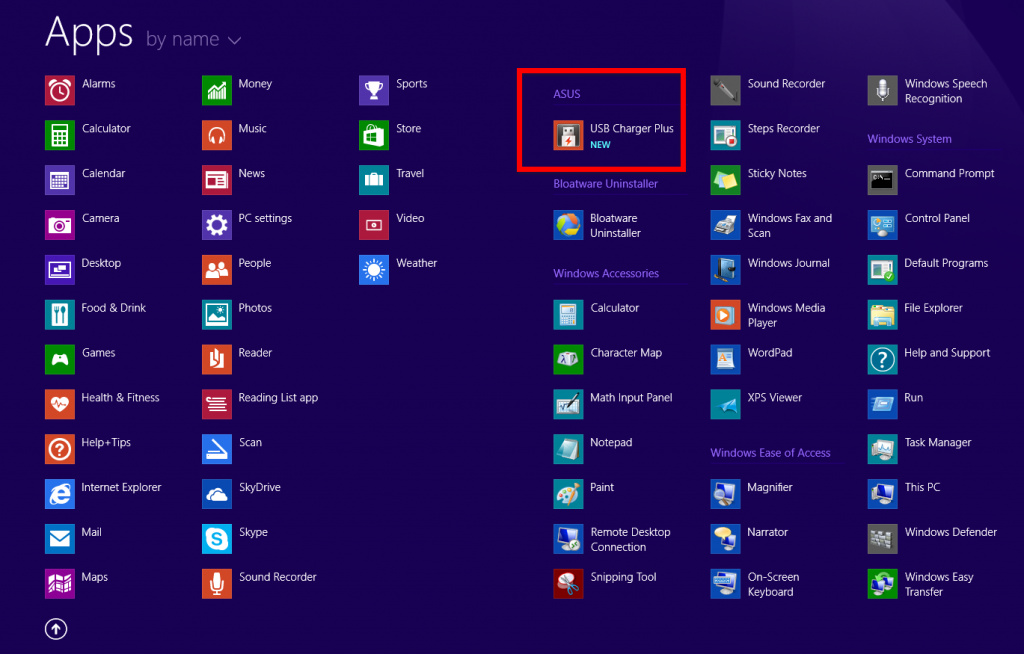
- Click the Windows Start button, look for Control Panel.

- Click Control Panel.
- Click Uninstall a program.
- Look for ASUS USB Charger Plus in the list of available programs.

- Click Uninstall.
- Click Yes to run Windows default uninstaller, and click OK to finish the auto uninstall process.
How to tell if ASUS USB Charger Plus was uninstalled cleanly
After uninstalling, restart your computer. Then start Windows Explorer and see if there is still a folder with the name of the software under C:\Program Files. Be sure to check the Registry as well for remnants of ASUS USB Charger Plus.
To do this, start “Regedit“, then look under “HKEY_LOCAL_MACHINE” > “Software” for ASUS USB Charger Plus or the name of the producer. Always keep in mind that only a computer professional should ever directly delete entries in the Windows Registry.
What to do if ASUS USB Charger Plus does not Uninstall
If you failed to uninstall ASUS USB Charger Plus by the above manual process after doing all the steps, or you just like the people who just can successfully remove it from the Control panel, then try the second way to get rid of ASUS USB Charger Plus, which will be quite easy for people.
How to uninstall ASUS USB Charger Plus Automatically (Easiest Way)
The easiest way to remove any kind of software cleanly and accurately is to use an uninstaller tool. Because the uninstaller automatically creates a backup, there is no risk of anything going wrong.
Follow the detailed steps to run Bloatware uninstaller:
Step 1
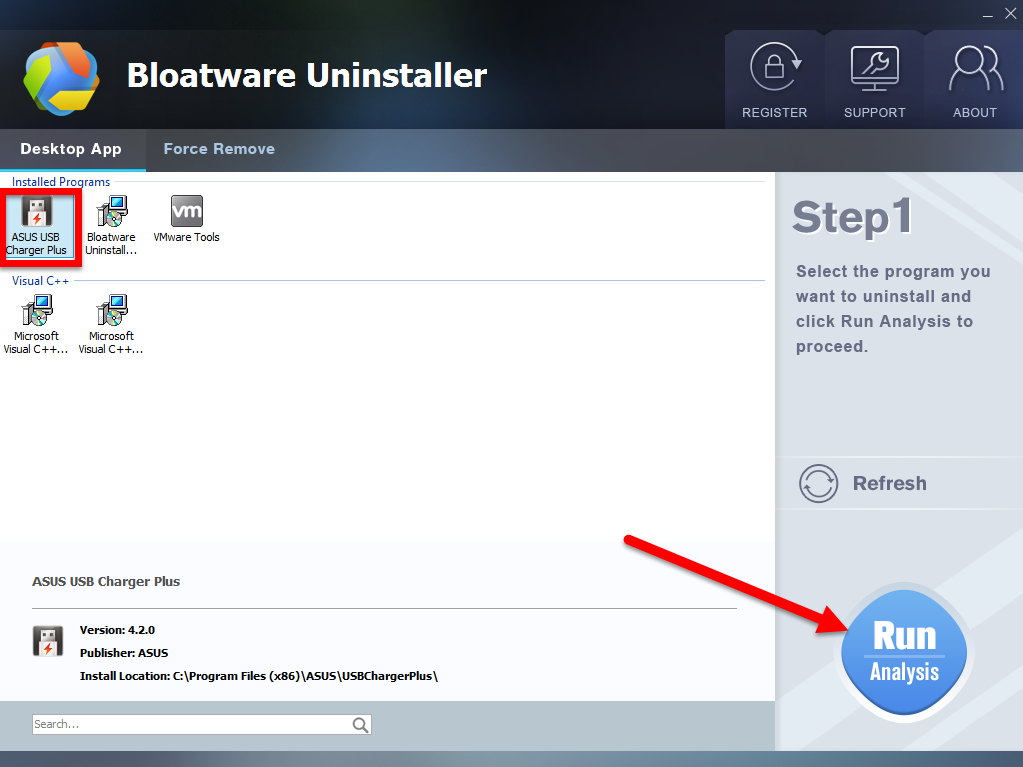
- Launch the remover, then select ASUS USB Charger Plus on the interface,
- And click on Run Analysis to proceed out all files/folders/registry entries supposed to be gone.

Step 2
- Click on Complete Uninstall after all the components are scanned out;
- Click Next, and then Remove in the pop-up dialog and follow the prompts to complete the removal until it Finish;
- Click on Scan Leftovers to conduct a full scan for the program leftover.
Step 3
- Click on Delete Leftovers and then Yes in the pop-up confirmation dialog;
- After all the leftovers have been removed completely, click OK to end the process;
- Back to Step 1, you will find ASUS USB Charger Plus is gone, as well all the leftovers;
Learn more detailed to uninstall ASUS USB Charger Plus by this video below:
More tips: What does the USBChargerPlus.exe file do?
The USBChargerPlus.exe process is also known as ASUS USB Charger Plus and is a part of ASUS USB Charger Plus. This software is produced by ASUSTek Computer (www.asus.com). An obsolete or defective version of USBChargerPlus.exe can cause problems for your computer that can range from slowness to error messages such as these:

- ASUS USB Charger Plus has stopped working. Windows is checking for a solution to the problem… (Windows 10, 8, 7)
- ASUS USB Charger Plus has stopped working. A problem caused the program to stop working correctly. Windows will close the program and notify you if a solution is available. (Windows 10, 8, 7)
- USBChargerPlus.exe has encountered a problem and needs to close. (Windows XP)
- Access violation at address FFFFFFFF in module USBChargerPlus.exe. Read of address 00000000.
- ASUS Software
- 23 Nov 2018


