How to Uninstall HP SimplePass without Hurting My Computer?
“Hi, I want to uninstall HP SimplePass from my computer, how to do it? Would it hurt my desktop computer if I were to remove the app of HP SimplePass? I’m on a windows 8.1 64 bit desktop computer.”
From Hewlett Packard Development Company:
HP’s SimplePass is a program designed to increase security by using your fingerprint to verify your identity. This helps prevent unauthorized users from gaining access to your business or client information.
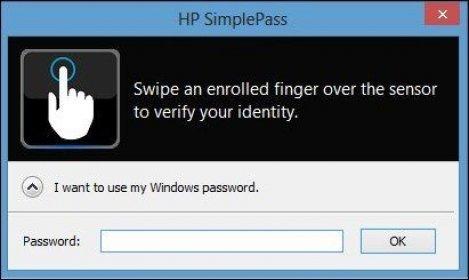
However, things can be tricky to uninstall HP SimplePass from computer, so this page is mainly about offering the useful tips & method to help remove SimplePass, and it would hurt your desktop computer, keep reading to learn more.
If you like a safer way to uninstall HP SimplePass, then choose the third party removal tool to help completely get rid of HP SimplePass, it would cause any damage on computer and delete all leftovers in one time.
Safely Uninstall HP SimplePass
Try this way to fast uninstall HP SimplePass, and learn more useful steps of Bloatware Uninstaller on computer
1. Fully End task (s) of HP SimplePass
Follow these steps can completely quit HP SimplePass to ensure successfully removing:
- Launch the Windows Task Manager by pressing shortcuts Ctrl +Alt +Delete;
- Select all process related to HP SimplePass running in Manager;
- Or any process relate to HP;
- Hit “End Task” to close them.
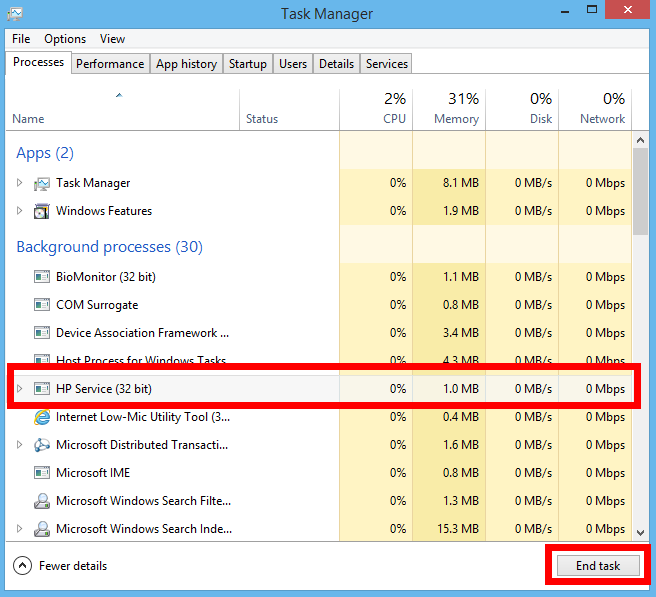
2. Now, start the removal tour in Bloatware to fast & safely remove HP SimplePass in easy steps:
Step 1. First launch Bloatware on desktop, and select the HP SimplePass you want to remove in the installed programs list, and then hit the green button of Run Analysis to begin remove it;

Step 2. Just wait for a second to let BU analysis HP SimplePass, and then easily press Complete Uninstall button to continue;
Step 3. Follow the uninstall direction to complete the auto process, click the option “Delete my identity” to delete personal information in popup windows. Wait for a while until the Scan Leftovers button lights up, then click on it. Then, click on “Delete Leftovers” button to completely uninstall HP SimplePass.
To learn more details to completely remove HP SimplePass, please follow our video tutorial below:
Manually Remove HP SimplePass
If you want to uninstall HP SimplePass by manual process in Windows default uninstaller, then follow the removal guide down below.
1. Fully End task (s) of HP SimplePass
- Launch the Windows Task Manager by pressing shortcuts Ctrl +Alt +Delete;
- Select all process related to HP SimplePass running in Manager;
- Or any process relate to HP;
- Hit “End Task” to close them.

2. Follow the steps to uninstall SimplePass in Windows
Step 1. Open “Control Panel” and select “Uninstall a program.”
Step 2. Locate “HP SimplePass” in the list of installed programs. Select it and click “Uninstall.”
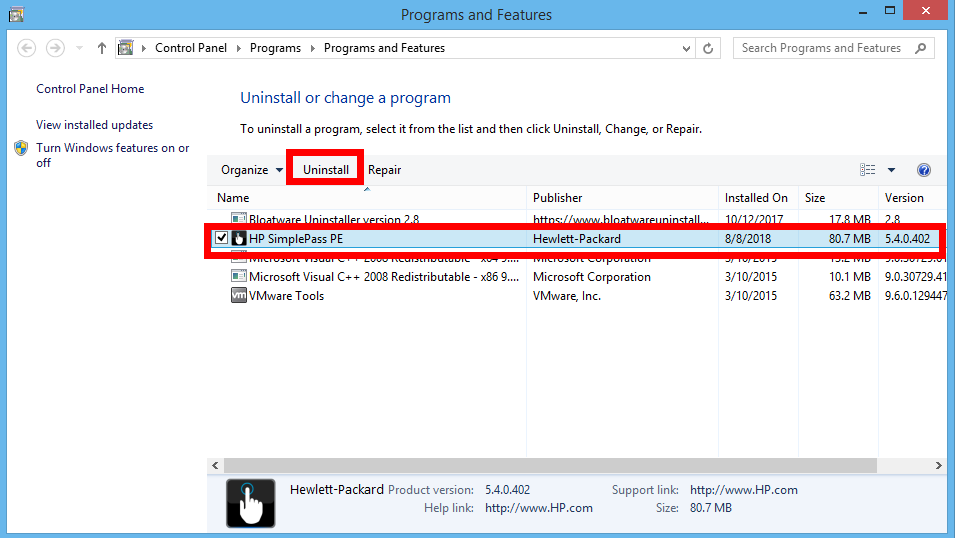
Step 3. Swipe your fingerprint or enter your Windows password to complete uninstallation.
Step 4. Follow the uninstall direction to complete the auto process, click the option “Delete my identity” to delete personal information in popup windows

Step 5. Reboot your computer once the program is removed to finish the process.
Step 6. Click on the Start menu on the screen, negative Run;
Step 7. Type regedit in the box and hit OK;

Step 8. Then you will go to Registry Editor, delete the Registry keys related to HP SimplePass;
Step 9. Or press Ctrl + F to negative Search box and type the key words HP SimplePass in the box;
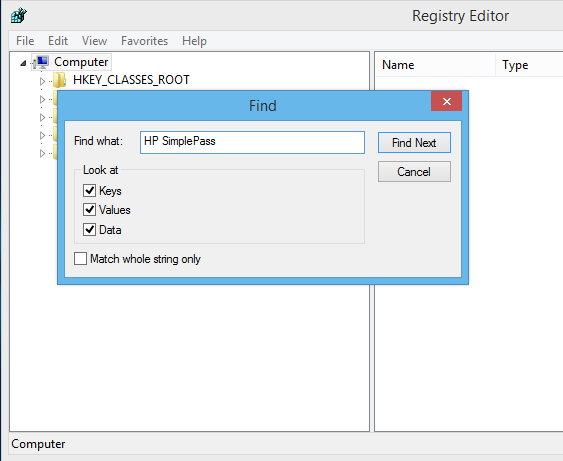
Step 10. Hit Find Next, delete the target item when it shows up.
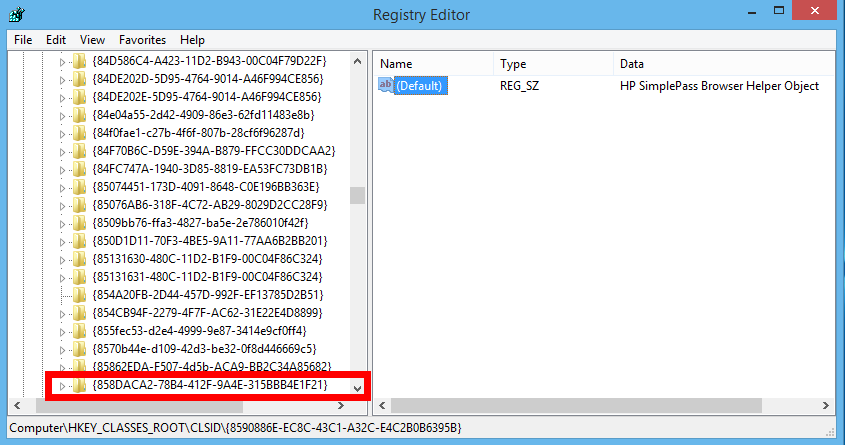
Warning: Do not alter any other registry settings. Registry settings control essential parts of the operating system and programs on your computer. Altering any other settings may cause your system to become inoperable. You’d better to back up the Registry Editor before you delete the HP SimplePass register.
More tips: How to Disable SimplePass
Disabling this software removes the requirement for a fingerprint during sign in, although you can still assign a password to each user account for security purposes. You can stop the program in one of three ways: by turning off the biometric login; by disabling the validity sensor driver; or by uninstalling the program completely.
Remove Biometric Login
Step 1. Turn off the biometric login option to remove the need for fingerprints to sign on. Open “Control Panel” and then “Biometric Devices.”
Step 2. Select “Change Biometric Settings.” Uncheck the “Allow users to log on to Windows using their fingerprints” option. Click “Save” to apply changes.
Step 3. Click the round “Biometrics Off” button to remove the stored data for all users. This will delete all stored fingerprint information.
Disable the Driver
Step 1. Disable the Validity Sensor Driver that controls the fingerprint scanner. Open “Control Panel” and then “Device Manager.”
Step 2. Locate “Biometric Devices” in the device list. Right-click on “Validity Sensor.”
Step 3. Select “Disable” from the new dialog box. Your fingerprint scanner will no longer function.
- Password Managers, Security Software
- 08 Aug 2018


