How to Uninstall Intel Graphics Driver Completely, Windows Tutorial
“So, I am using a Windows 10 ProBook, and I recently saw in the programs that there is a program called Intel Graphics Driver. I’m playing a game from Steam and it says it crashes with Intel Graphics, which happened to me. I think that these crashes are related to the Intel Graphics Driver (which I didn’t install). So, if I uninstall Intel Graphics Driver, will it cause anything bad to my computer?”

Determine why and how to uninstall these drivers. The bloatware uninstaller is a good choice, and includes more instructions for uninstalling your Intel® Graphics Driver.
Reasons for uninstalling Intel Graphics Driver:
- A technical support representative prompts you, as part of troubleshooting an issue.
- Your last driver installation didn’t complete successfully, or ran into errors.
- A previous driver had better functionality for your specific needs.
Note: If your computer is always connected to the Internet, the Windows Update tool may attempt to automatically install the latest drivers. If you encounter this situation, try by temporarily disconnecting from the Internet.
We strongly recommend you read this post carefully before you proceed to uninstall Intel Graphics Driver from Windows system. This article will explain very detailed information about removal measures for you, and follow the detailed steps to remove Intel Graphics Driver completely & safely
Uninstall Intel Graphics Driver via the Add/Remove Programs Method
You might know how to remove unwanted software on Add/Remove Programs, now read the points below to uninstall Intel Graphics Driver.
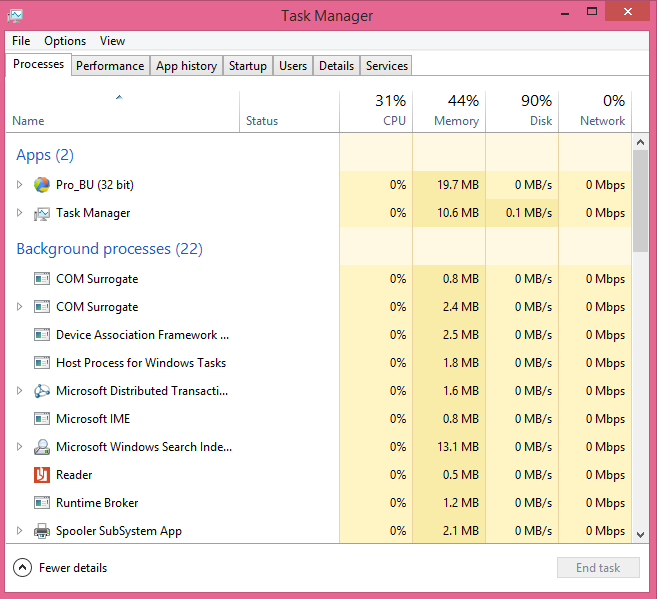
1. Before removal, End task (s) of Intel Graphics Driver
- Launch the Windows Task Manager by pressing shortcuts Ctrl +Alt +Delete;
- Select all process related to Intel Graphics Driver running in Manager, or any process relate to Intel;
- Hit “End Task” to close them.
2. Open the Add/Remove Programs window using the steps provided for your operating system:
- In Windows 7: Click Start, select Control Panel, click Programs, select Programs and Features.
- In Windows 8.1*: Press the Windows key and the X key together, select Programs and Features.
- In Windows 10: Press the Windows key and the X key together, select Apps and Features.
- Find the Intel Graphics Driver. The driver can also be called the Intel® Graphics Media Accelerator Driver (Intel® GMA Driver).
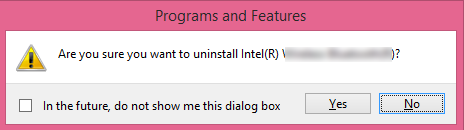
- Right-click the Intel Graphics Driver and select Uninstall.
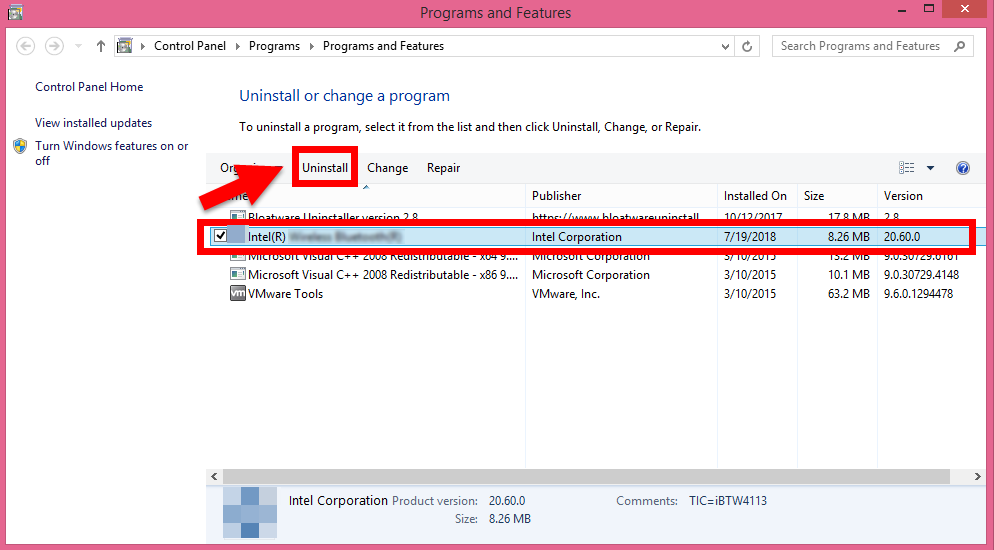
- Follow the prompts stated by the Intel Installation Framework window to complete the process.
- The system must go through a restart to complete the uninstall process.
- If no older drivers are stored in the system, the graphics controller in device manager should now be listed as ‘Microsoft Basic Display Adapter‘, ‘Standard VGA Graphics Adapter’ or similar. If not, repeat steps 1 through 5.
Video Instruction – How to open Add/Remove Programs and remove Intel Graphics Driver:
3. Delete leftover registry value on Register Editor:
- Click Start-Run, type in regedit to activate registry editor, locate the below registry keys and values and delete them from the list.
- Or press Ctrl + F to negative Search box and type the key words Intel Graphics Driver in the box, hit Find Next, delete the target item when it shows up.
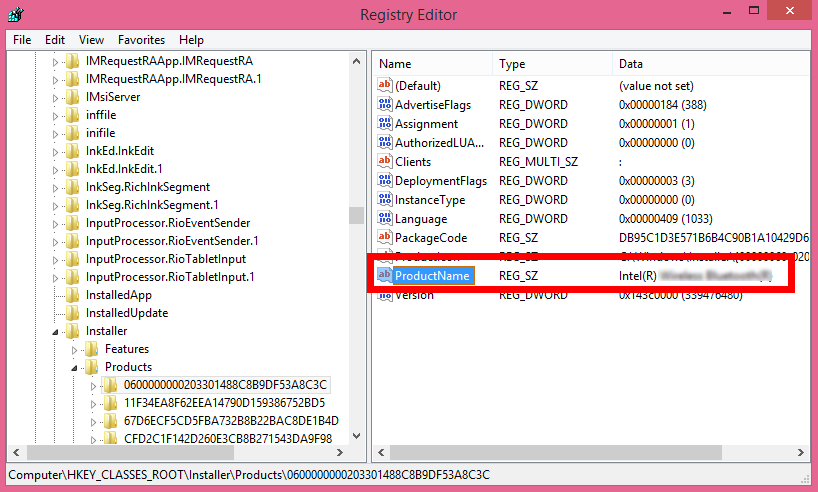
Warning: Do not alter any other registry settings. Registry settings control essential parts of the operating system and programs on your computer. Altering any other settings may cause your system to become inoperable. You’d better to back up the Registry Editor before you delete the Intel Graphics Driver register.
4. Delete leftover files:
- Click on the Start – Control Panel, and double click Folder Options, select “Show Hidden Files and Folders“, then locate the blew folders and delete them directly:
(C:\Program Files\)
(C:\Document and Settings\All Users\Application Data\)
(C:\Documents and Settings\%USER%\Application Data
Probably it might be too complicated and difficult to finish all steps or not to make any mistake for a newbie, if you’d like to find an easier way to uninstall Intel Graphics Driver, Bloatware uninstaller is an excellent choice that you won’t miss.
Uninstall Intel Graphics Driver via Bloatware uninstaller
this specialized uninstaller can not only help you uninstall Intel Graphics Driver effectively, but also identify and delete all leftover files, folders and invalid registry entries belonging to Intel Graphics Driver in a short time. Follow the simple instruction here to remove it:
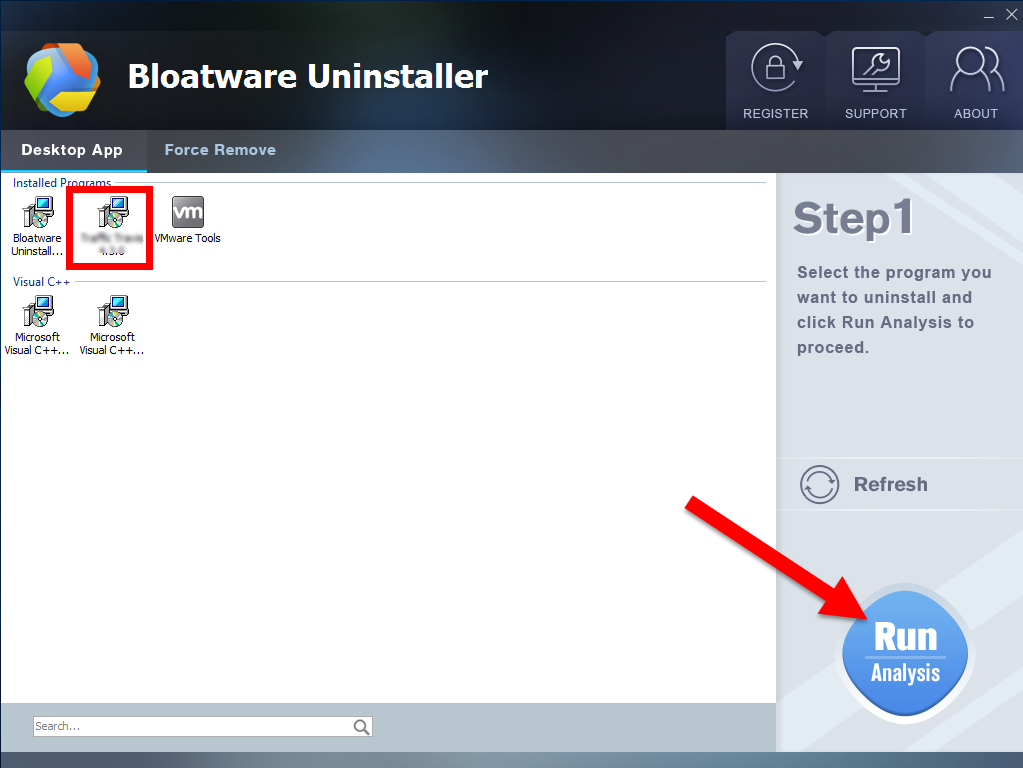
1. First launch Bloatware on desktop, and select the Intel Graphics Driver you want to remove in the installed programs list, and then hit the green button of ‘’Run Analysis‘ to begin remove it;
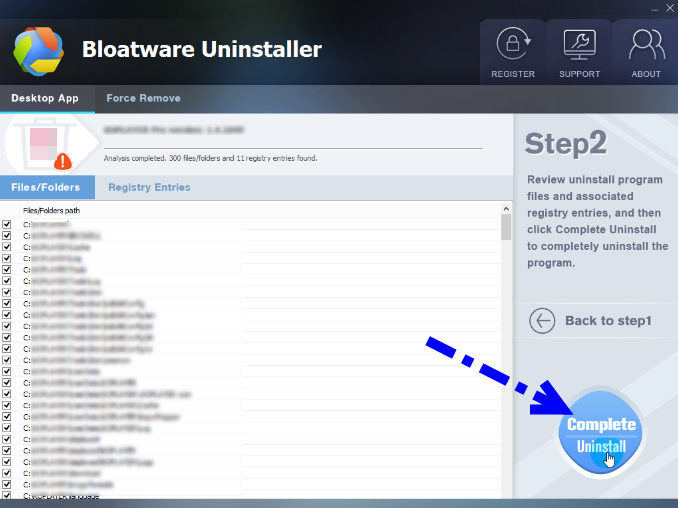
2. Just wait for a second to let BU analysis Intel Graphics Driver, and then easily press “Complete Uninstall” button to continue;
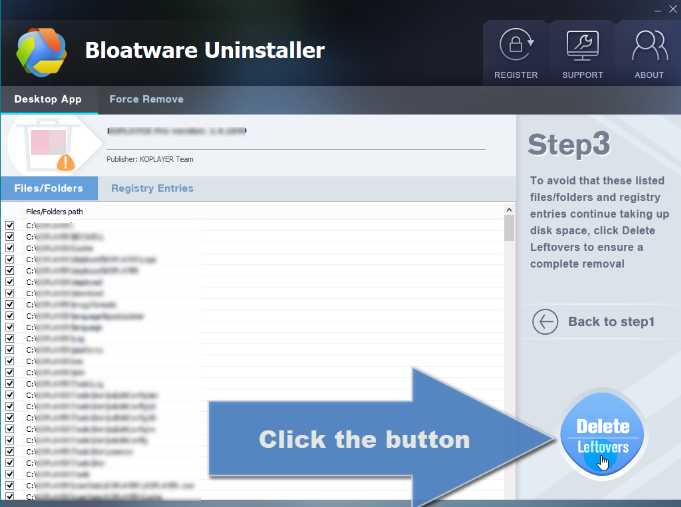
3. Follow the uninstall direction to complete the auto process. Wait for a while until the Scan Leftovers button lights up, then click on it. Then, click on “Delete Leftovers” button to completely uninstall Intel Graphics Driver.
Is it simpler and easier to uninstall Intel Graphics Driver from computer? Will you choose the automated remover to uninstall things in Windows? In my opinion, you won’t regret to download one on your computer or laptop.
- Drivers, Intel Software
- 12 Sep 2018