How to Uninstall ShareX from Windows PC Thoroughly?
Would you like to know how to uninstall ShareX from Windows based computer completely? Would you like to finally remove all the ShareX app’s files without any hassle? Or would you like to follow the easy instructions I will lay down for you to master the basics of uninstalling a Windows program in no time at all? Let me help you in this guide, I will tell you which method is easy to use, and how you can use the provided two methods to shorten your uninstalling curve and become confident in removing any unwanted program from Windows. Join this guide today, that is the first step to be able to uninstall a program on your own.

What is ShareX?
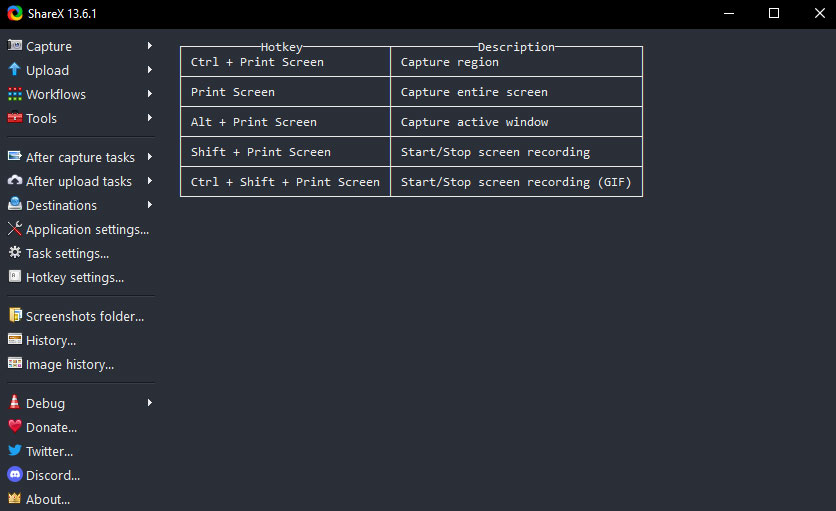
Simply speaking, ShareX is a free and open-source app that is used to capture and record your screen. It covers almost all basic functions and features that you may need to produce a high-quality video, including full screen capture, screen recording, GIF screen recording, text capture, auto capture, upload file, and more. ShareX comes with a variety of tools, including color picker, screen color picker, ruler, image editor, image effects, image combiner, image splitter, image thumbnailer, video converter, video thumbnailer, hash check, QR code, DNS changer, and more. ShareX also allows you to perform some after capture tasks, whether you want to add image effects, save image to file, perform actions, save thumbnail images or others. Besides that, when you want to upload your videos, you can shorten URL and share with others fast and easily.
How to Completely Uninstall ShareX from Windows?
Whether you are a complete Windows beginner or an experienced user, the next uninstall instructions will help you understand how to uninstall ShareX from Windows successfully. You will know how to uninstall ShareX manually, including all the basics to succeed in a complete uninstalling. You will also get a fast and easy method that uses a professional uninstaller software named Bloatware Uninstaller to uninstall ShareX and all its leftover files with a few clicks.
Method 1: Uninstall ShareX Manually
Get how to uninstall ShareX in the manual way.
Step 1: Close ShareX process from Task Manager
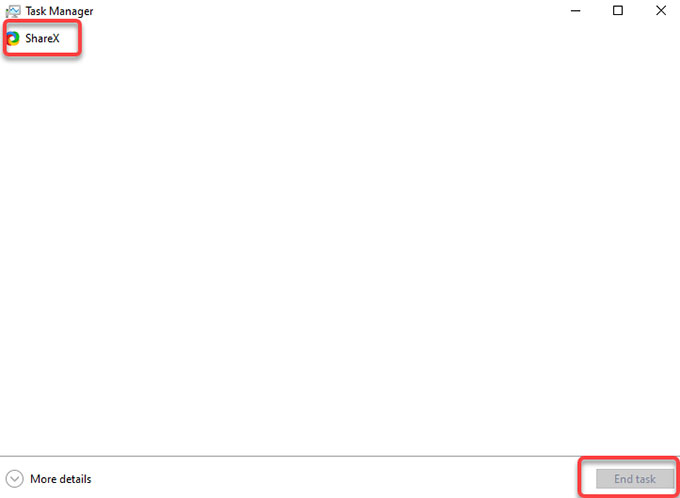
Simply right-click the ShareX program on the Taskbar and select Close. If you can’t close ShareX normally, we can open Task Manager and close all the program’s process there. Select a method to open Task Manager based on your specific Windows operating system.
There are three methods to open Task Manager according to a specific Windows version, choose the method that is right for you.
- For Windows 7: Press Ctrl + Shift + Esc keys together to open Task Manger.
- For Windows 8: Press Windows + X keys to open Task Manager.
- For Windows 10: Right-click the Start menu > select Task Manager.

- From the Task Manager, click the ShareX program and click Close/ End.
Step 2: Launch Control Panel
According to the different Windows operating system, there also three methods to open Control Panel and they are listed below. Choose a proper method to launch Control Panel on your computer.
- For Windows 7: Click the Start menu > click Control Panel.
- For Windows 8: Press the Windows icon + X keys > select Control Panel.
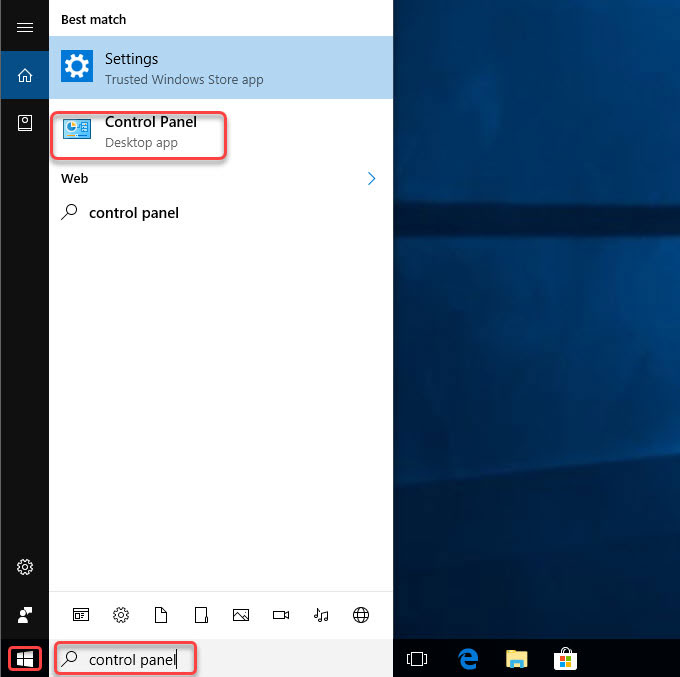
- For Windows 10: Open the search box “Type here to search” besides the Start menu > fill in Control Panel to open it.
Step 3: Uninstall ShareX.
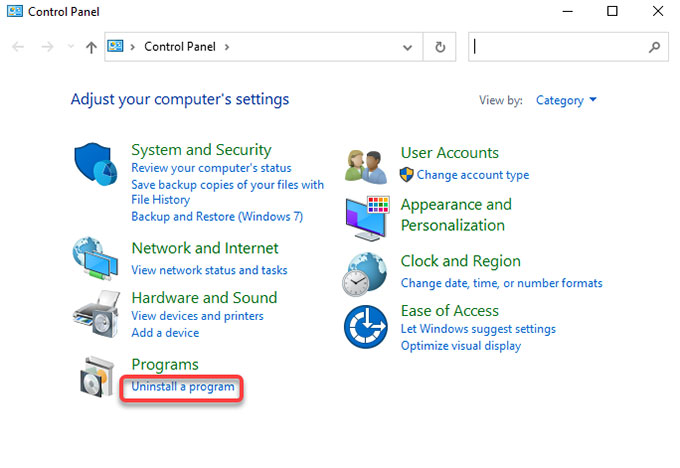
Now, the Windows Control Panel is opened, click Uninstall a program.
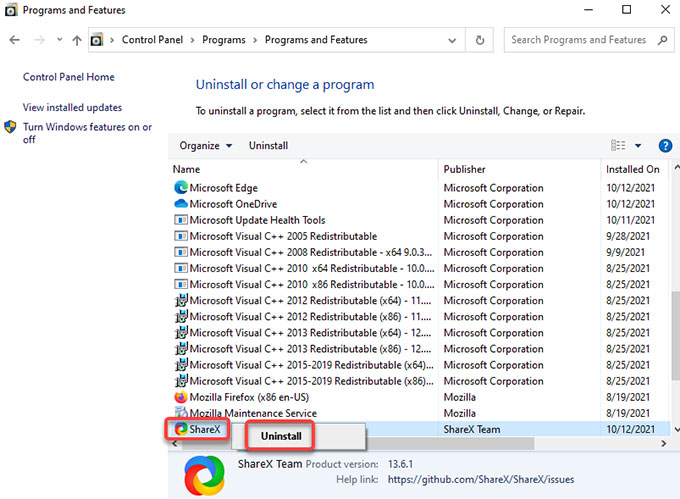
Step 4: If you are on the old version of Windows, you will see the programs and Features window. Right-click on the ShareX program that you want to uninstall > click Uninstall.
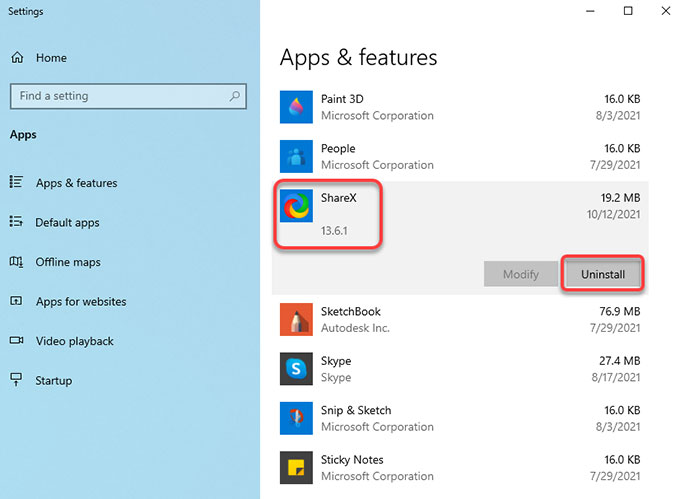
If you are on Windows 10, you will see Apps & Features window, click the ShareX program from the list > click Uninstall.
Step 5: Click Yes to make sure that you want to uninstall ShareX right now. Follow the pop-up uninstall wizard to remove ShareX from your computer.
Step 6: Open Registry Editor, refer to as:
- For Windows 7: Press Windows + R keys together to open Run > enter ‘regedit‘ in the Open: box > press Enter key.
- For Windows 8: Press Windows + X keys together > select Run option from the pop-up menu> enter ‘regedit‘ in the Open: box > press Enter key.
- For Windows 10: Right-click the Start button > click Run option > enter ‘regedit‘ in the Open: box > press Enter key.

Step 7: From Registry Editor, click Edit > click Find… > enter the name of ShareX> click Find Next or press Enter key. It will be searching the registry. Next, you need to delete the lefto files associated with the ShareX.
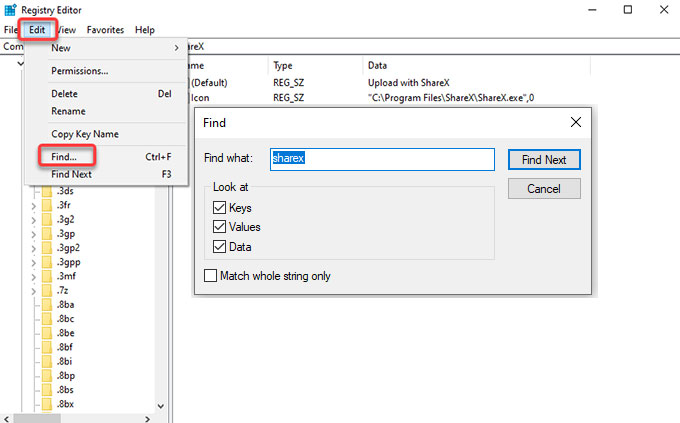
Along with that, navigate to the sub-folders below and delete files associated with the ShareX program.
- HKEY_CURRENT_USER\Software
- HKEY_LOCAL_MACHINE\SOFTWARE
- HKEY_USERS\.DEFAULT\Software
Step 8: Restart your PC.
Method 2: Use Bloatware Uninstaller
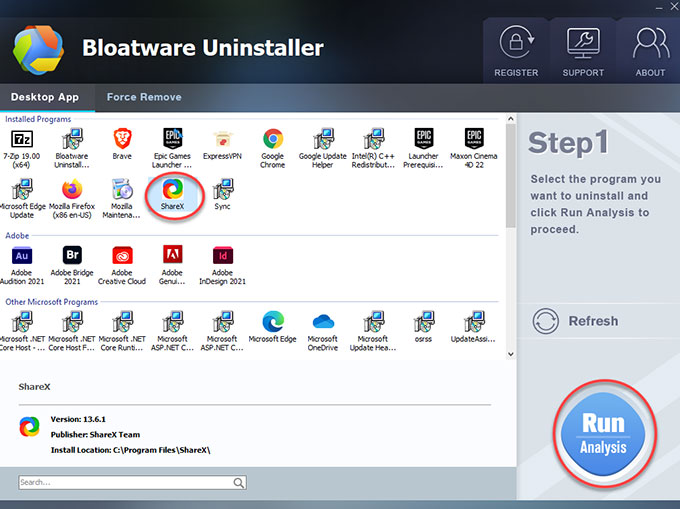
Step 1: Launch Bloatware Uninstaller > click the ShareX program > click Run Analysis.
Step 2: Click Complete Uninstall > click Yes to be sure you want to ShareX from your PC.
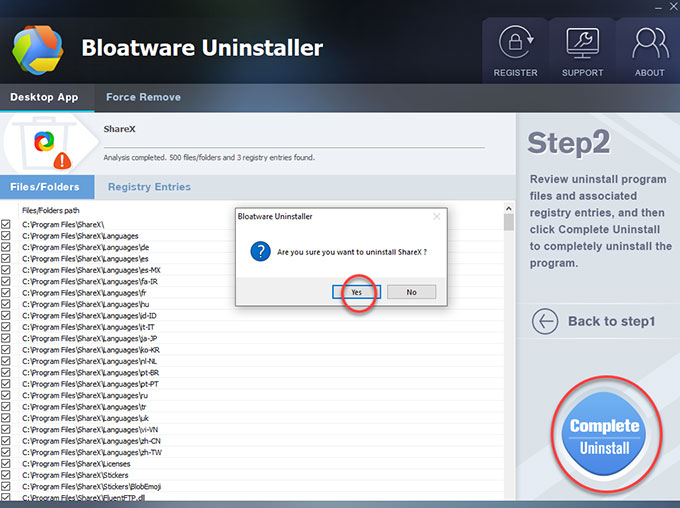
Step 3: Click Yes to continue this uninstall. And then click Continue.
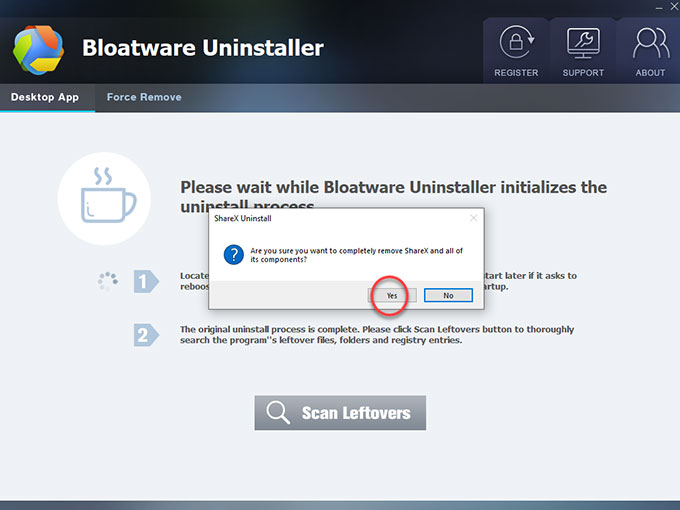
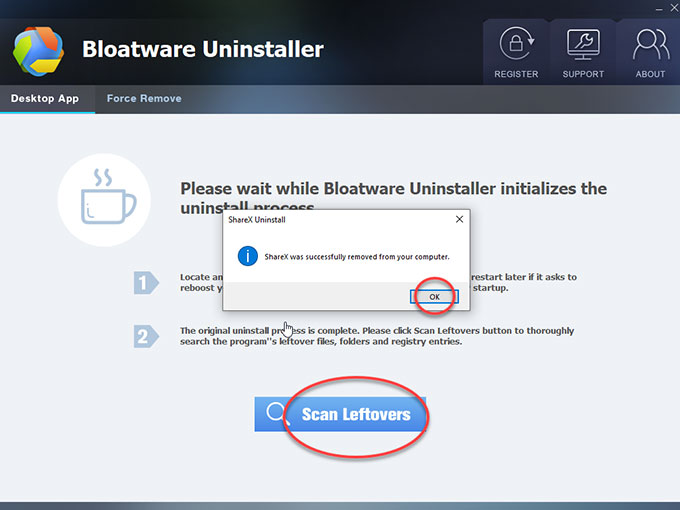
Step 4: Click OK > click Scan Leftovers to remove ShareX leftovers.
Step 5: Click Delete Leftovers > click Yes to make sure you are ready to delete all leftovers of the ShareX program.
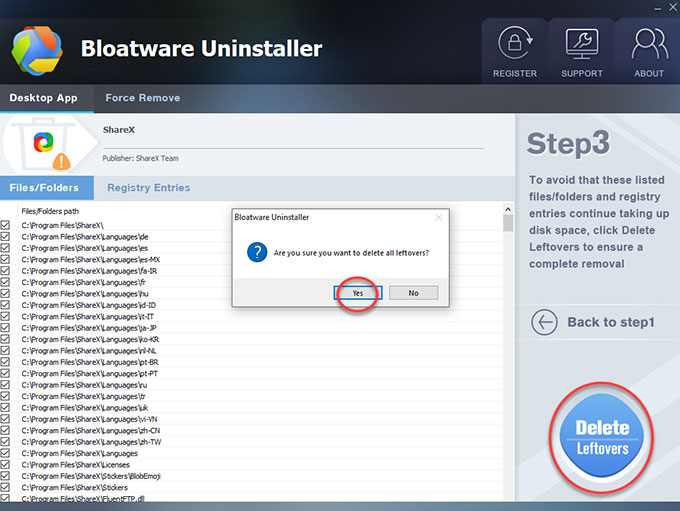
Step 6: Till now, all ShareX leftovers have been deleted. Click OK and quit Bloatware Uninstaller, and then restart your computer to make changes.
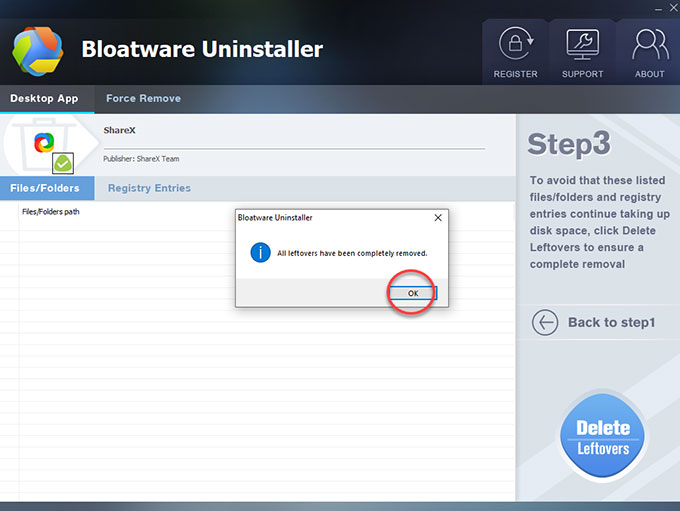
Also: Get how to uninstall ShareX using Bloatware Uninstaller effortlessly:
At Last
Till now, you may have understood how you can uninstall ShareX from Windows computer. If you want to try to uninstall ShareX on your own, then the mentioned manual uninstall instruction can help you understand what should be done. If you want to utilize a technical uninstaller app to solve all the issues of uninstalling Windows programs, then the professional Bloatware Uninstaller will be a good start. Besides that, Bloatware Uninstaller also can be used as a high productive tool to clean out any undesired programs from your PC with ease and free up more space so that fast speed up your PC.
Do you want to try this Bloatware Uninstaller? Click the following button to get started easily.
- Productivity Software
- 12 Oct 2021

