Solutions to Uninstall VeryUtils Video Cutter in Windows
On this page you can find find different solutions to correctly uninstall VeryUtils Video Cutter. If you’d like to know more about what this program is and how it works on your PC, read the following description.
VeryUtils Video Cutter is easy to use and supports most popular file formats. It enables you to trim videos without otherwise altering them, and the output videos can have a relatively good quality. There is no need of any professional IT skills or knowledge about all kinds of video formats. There is only a problem – it can be hard to remove in some cases.
To learn how to correctly uninstall VeryUtils Video Cutter, the following tutorials will be helpful.

How to Uninstall VeryUtils Video Cutter in Windows 8/10 (Start Screen)
1. In the bottom-left of your screen, click the Start button, and click the down arrow to view the Apps screens.
2. Right-click VeryUtils Video Cutter on the Apps screen, and select Uninstall in the bottom. You will be bought to the list of currently installed programs.
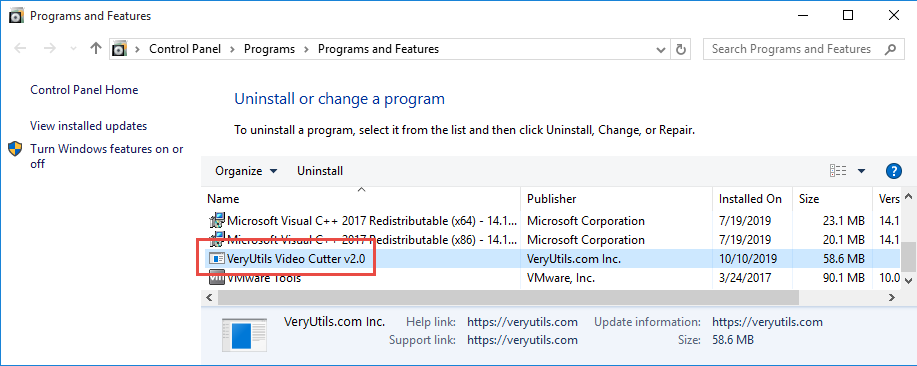
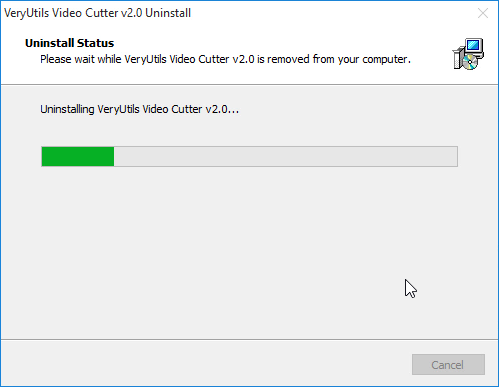
3. In the list, locate & double-click VeryUtils Video Cutter or click the Uninstall above to activate its built-in uninstaller. If there is any on-screen prompts, just follow them to proceed and confirm the removal.
4. You can choose to automatically restart the computer right now, or do it later.
5. Make sure there is other programs related to VeryUtils, and move on to delete the vestiges hidden elsewhere.
6. Press and hold the Windows key + C on your keyboard to open the Charms bar > Select Search > Enter “regedit” in the box to open the Windows Registry Editor.
7. Click Edit > Find… > Enter “VeryUtils” in the box to search for the related remaining files, then delete the remaining (if found) to completely uninstall VeryUtils Video Cutter.
7. Restart your computer if you haven’t done that in Step 4.
How to Uninstall VeryUtils Video Cutter in Windows 10 (Start Menu)
1. Access the unique Start menu of Windows 10 by going to Start > Settings > System.
2. Click Apps & Features on the left to see the programs list.
3. Select VeryUtils Video Cutter in the list of programs.
4. Click Uninstall > Uninstall. If there is any on-screen prompts, just follow them to proceed and confirm the removal.
5. You can choose to automatically restart the computer right now, or do it later.
6. Make sure there is other programs related to VeryUtils, and move on to delete the vestiges hidden elsewhere.
7. In Search, enter “regedit.”
8. Delete these two folders if found:
- HKEY_CURRENT_USER\Software\VeryUtils
- HKEY_LOCAL_MACHINE\SOFTWARE\VeryUtils
9. Click Edit > Find… >Enter “DYMO” in the box to search for the related remaining files, then delete the remaining (if found) to completely uninstall VeryUtils Video Cutter.
10. Restart your computer if you haven’t done that in Step 5.
Easily Uninstall VeryUtils Video Cutter with Bloatware Uninstaller
Step 1. Download, install and launch Bloatware Uninstaller from your desktop.
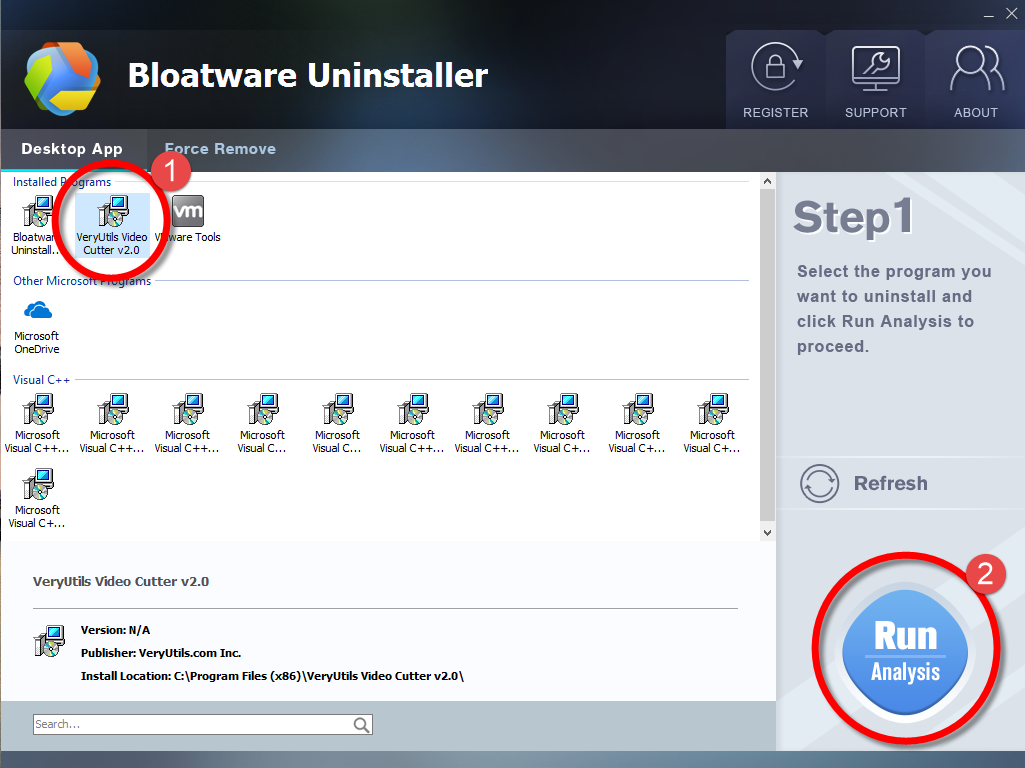
Step 2. Select VeryUtils Video Cutter in the list, and click Run Analysis in the lower right corner. It will take just a few seconds.
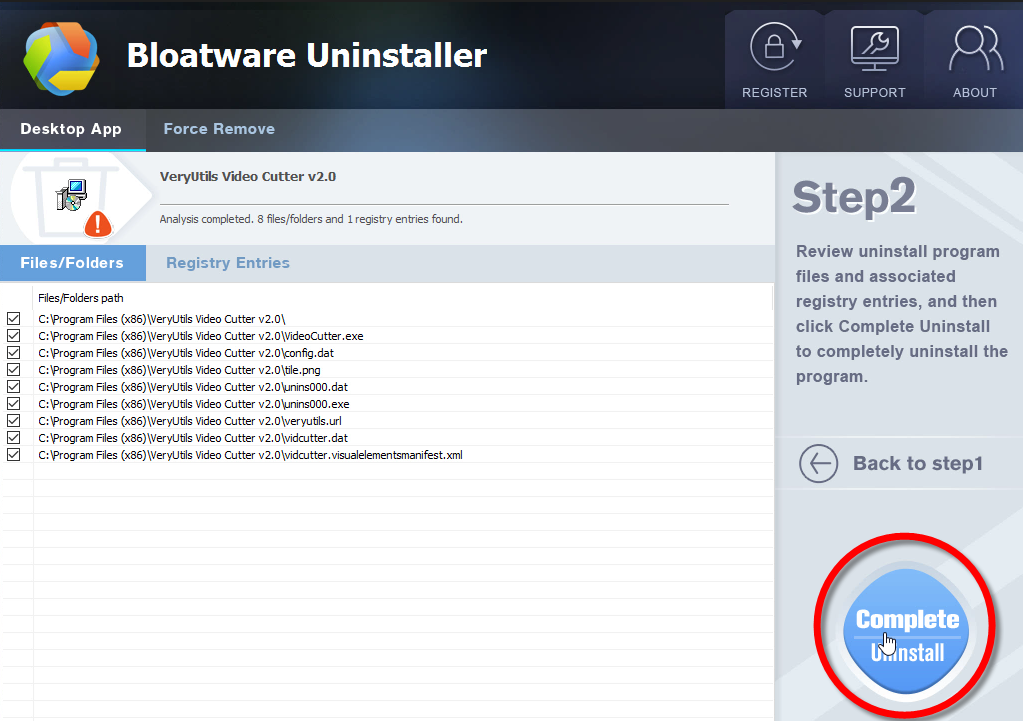
Step 3. Wait for it to finish scanning all the files, and click Complete Uninstall in the lower right corner to delete the files listed.
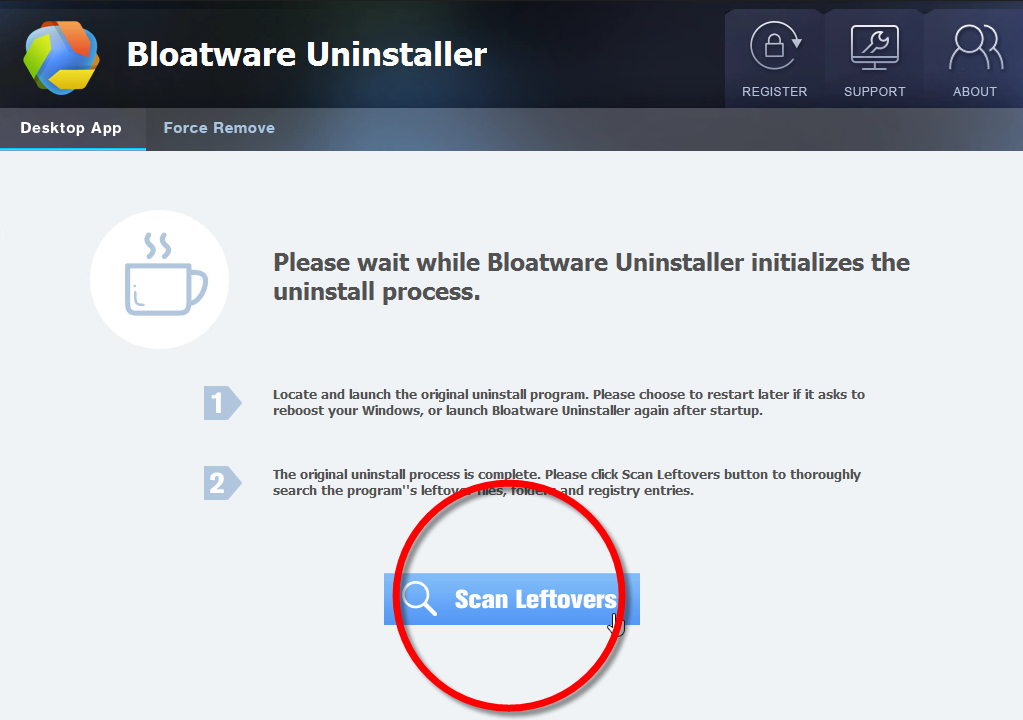
Step 4. Follow the prompts to move on, click Scan Leftovers, and click Delete Leftovers in the lower right corner to delete the leftovers listed.
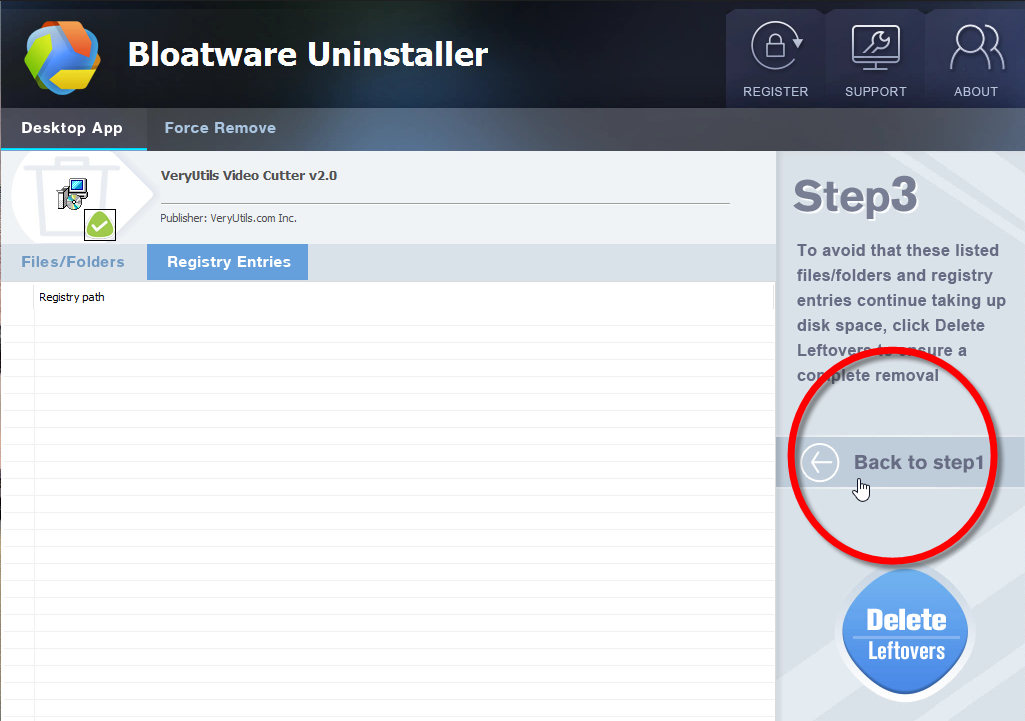
Step 5. Click Back to step1 to check the currently installed programs, see if VeryUtils Video Cutter has been removed. For any question you don’t want to ask or problem you encounter, reach their customer service for immediate assistance.
This short video will help you quickly understand the process:
Improve Your PC Performance – Limit How Many Programs Run at Startup
Most utilities are designed to automatically start when Windows loads. Publishers always set their products to run in the background, where you may not see them running, so that they can open right away when you click the icons. That’s truly user-friendly for programs you use very often, however, for those you seldom use or never plan to use, this wastes precious system resources and slows down your PC performance, for example, it takes long to finish starting up. You shall decide for yourself whether you want the program to run at startup.
But how can you possibly know what programs will automatically open at startup? Sometimes this could be obvious, because the program ads an icon to the notification area on the taskbar (system tray), where you can see it running. Check there to know whether there are any programs running that you didn’t play to run it. Point to each icon to get the program name, and be sure to click the Show hidden icons button so you won’t miss any of them.
- Utilities & Operating Systems
- 12 Oct 2019