How to Easily Uninstall FileZilla from Windows PC?
If you are one of those Windows users who already knew how hard it can be for you to find an effective method to uninstall FileZilla completely, or if you are looking for a step-by-step tutorial that will take you from a complete beginner to master uninstalling program, then you just came to the right place. Because this article will help you figure out how you can uninstall FileZilla successfully, covering the common-used manual way and powerful uninstaller software. If you are interested in picking up the methods and want to be able to remove an unwanted program from a Windows PC, then don’t miss out on reading this article to get more information.

FileZilla Overview
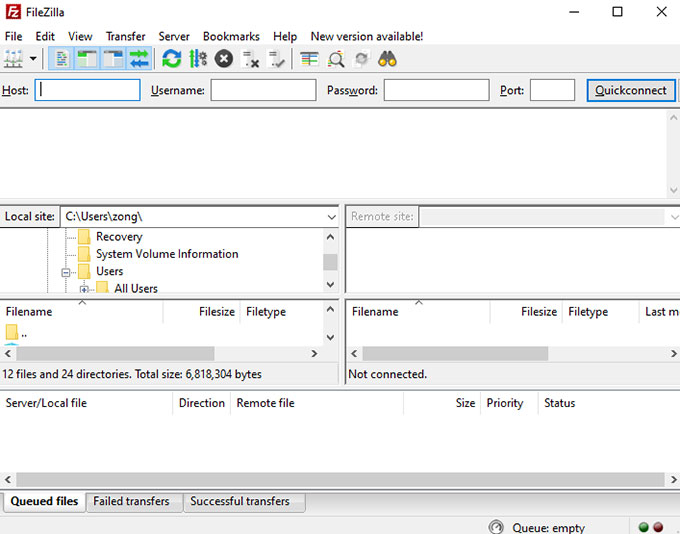
FileZilla is a free FTP solution widely used by developers and programmers because it is a free, open-source and all-in-one FTP client, supporting the formats of FTP, TLS, FTOS, and SFTP. If you are looking for more options, the FileZilla Pro will deliver you more protocols like WebDAV, Amazon S3, Backblaze B2, Dropbox, Microsoft OneDrive, Microsoft Azure File Storage Service, Microsoft Azure Blob Storage Service, Google Cloud Storage, Google Drive, OpenStack Swift, Box, etc. The good thing is FileZilla is free of charge and anyone can use it as a highly recommended free productivity tool.
FTP is a very basic file transfer protocol. It is a simple way to operate intuitively. For many years, it has been used as the code deployment method for many small and medium-sized projects or primary projects, and it is used to upload code files to run on the server side. Especially in the early days, when PHP was at its peak of popularity, websites were running in virtual spaces, and FTP was the main way to upload code.
FileZilla FTP client features:
- Years of maintenance, constant updates to make sure the program’s stability and high performance
- Fast speed and high stability
- The interface is simple and easy to use, almost no need to learn.
- Support multiple tags, support multiple languages
- Support FTP, FTPS, SFTP and other common file transfer protocols
- Comes with site management and is convenient to manage a number of website projects.
- Support remoting search and finding files
Now there are many ways to deploy a program project. Also, there tend to be professional, commercial projects now generally rarely use FTP clients, but in some small projects, fast demo or personal websites, or even corporate website deployment, there is still a need for this simple and fast way.
Methods to Uninstall FileZilla from Windows Computer
So now we get to know how you can uninstall FileZilla by two different methods. One will utilize the control panel to uninstall FileZilla, and the other one will use a professional uninstaller software called Bloatware Uninstaller. If you are looking for a professional uninstaller to help you uninstall easily, then skip to the second method directly.
First Method – How to Remove FileZilla Manually
Step 1: If you the FileZilla is running on your PC, the first thing we need to do is to quit it and close all its process in order to achieve a complete and uninterrupted removal. So, we need to get started with Task Manager. There are 3 methods available for you to open Task Manager on your PC, which is different based on your specific Windows operating system.
- For Windows 7: Simply by pressing three keys of Ctrl + Shift + Esc to launch Task Manger.
- For Windows 8: Simply by pressing two keys of Windows + X to launch Task Manager.
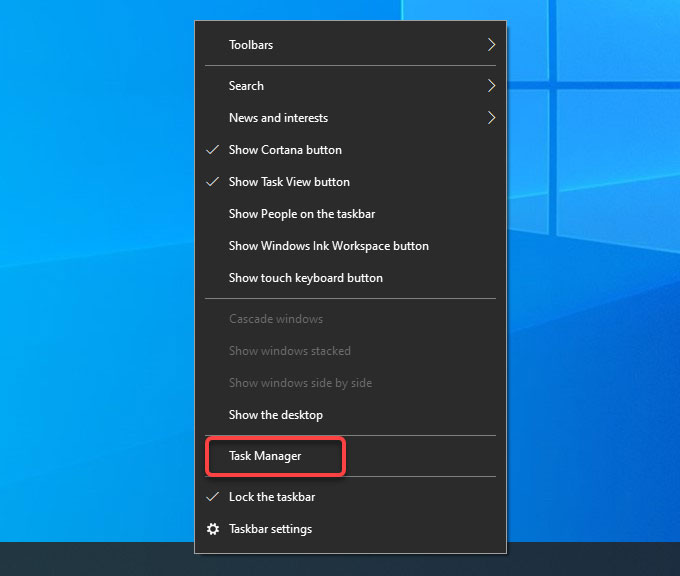
- For Windows 10: Right-click the Start menu > select Task Manager from the pop-up menu options.
- Or simply by right clicking on the Taskbar > select Task Manager.
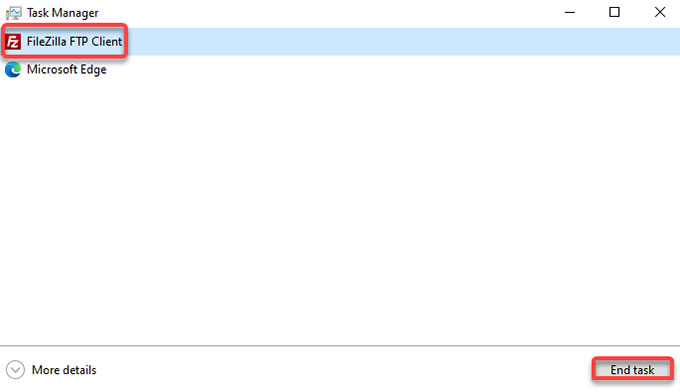
- When the Task Manager is opened, you need to click FileZilla program > click End Task.
Step 2: Open Control Panel.
There are several methods listed as followed, referring to open Windows Control Panel.
- For Windows 7: Click the Start menu > click Control Panel.
- For Windows 8: Simply by pressing the two keys of Windows + X > then select Control Panel.
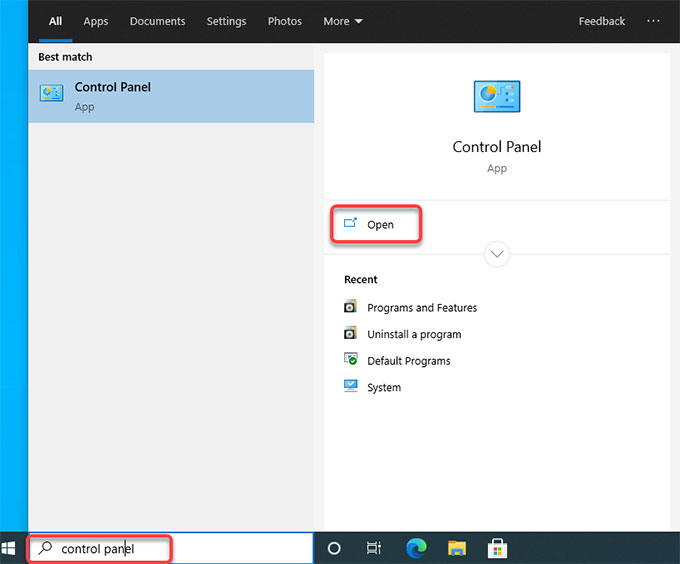
- For Windows 10: Open the search box “Type here to search” besides the Start menu > enter the word ‘control panel’ > click Open to launch Control Panel.
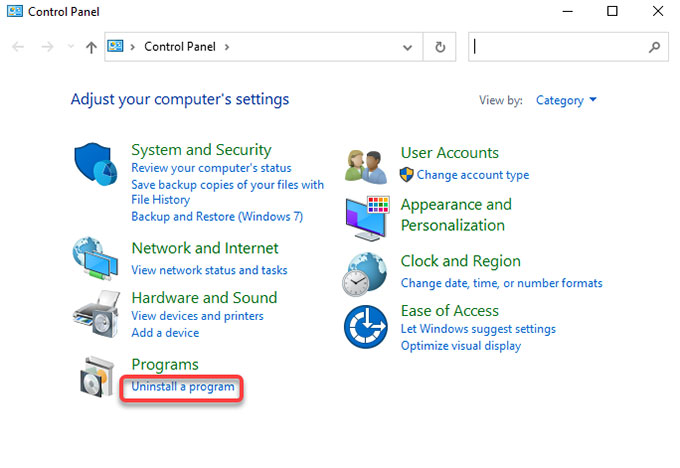
Step 3: Uninstall FileZilla.
Now, it is the time to uninstall FileZilla program through the Windows built-in uninstaller. So select Uninstall a program option under Programs.
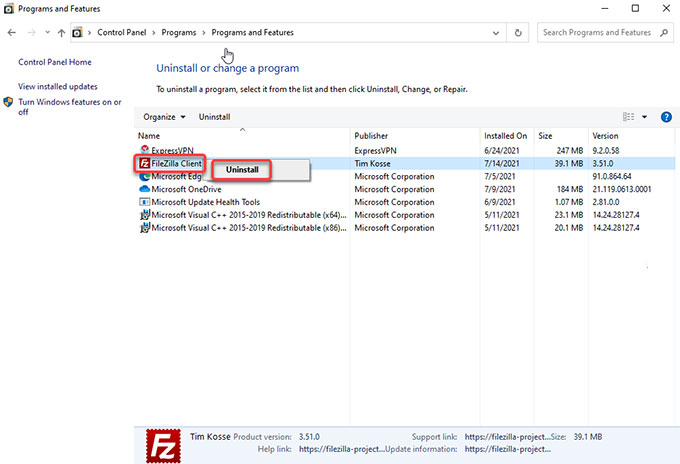
Step 4: Uninstall or change a program.
- Right-click on the FileZilla program that you need to uninstall > click Uninstall.
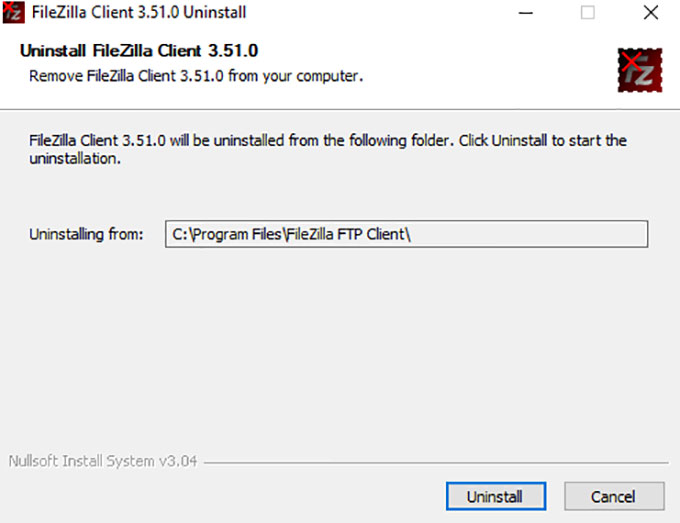
- Click Uninstall again to make sure you want to remove the FileZilla program from your Windows computer. Next, follow up the pop-up uninstall wizard to get the FileZilla program removed , once done, click Finish to quit the uninstall wizard.
Step 5: Open Registry Editor to clean leftovers out.
If you’ve finished the steps mentioned above and removed the FileZilla program through the Windows built-in uninstaller, then you may think the removal is complete. However, it is partially. There are also some leftover files and registry entries that need to be deleted. And we will utilize the Windows Registry Editor. Refer to simple methods to open Registry Editor on your PC.
- For Windows 7: Press Windows + R keys together to open Run > enter ‘regedit‘ in the Open: box > press Enter key.
- For Windows 8: Press Windows + X keys together > select Run option from the pop-up menu> enter ‘regedit‘ in the Open: box > press Enter key.
- For Windows 10: Right-click the Start button > click Run option > enter ‘regedit‘ in the Open: box > press Enter key.

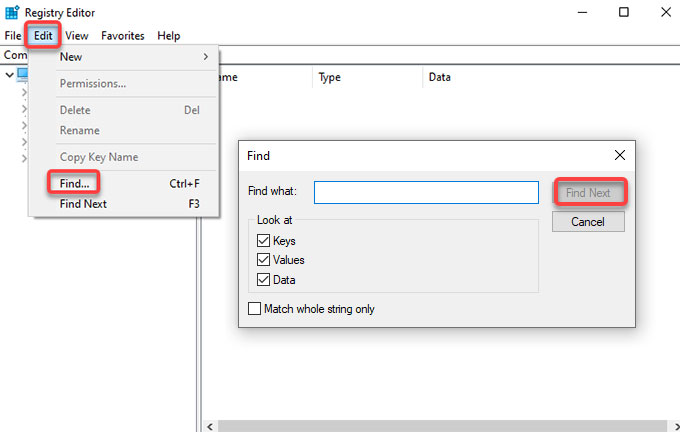
Step 6: Find and delete leftovers.
From the Registry Editor interface, click Edit > click Find… > enter the name of ‘FileZilla’ > click Find Next or press Enter key. In the search results, you need to find and delete all files and entries associated with the FileZilla program.
- HKEY_CURRENT_USER\Software
- HKEY_LOCAL_MACHINE\SOFTWARE
- HKEY_USERS\.DEFAULT\Software
Please Note: You should be careful when you delete any file in Registry Editor, any system file deletion by mistake probably brings out more trouble to you.
Step 7: Restart your PC.
Second Method – How to Uninstall FileZilla in Bloatware Uninstaller
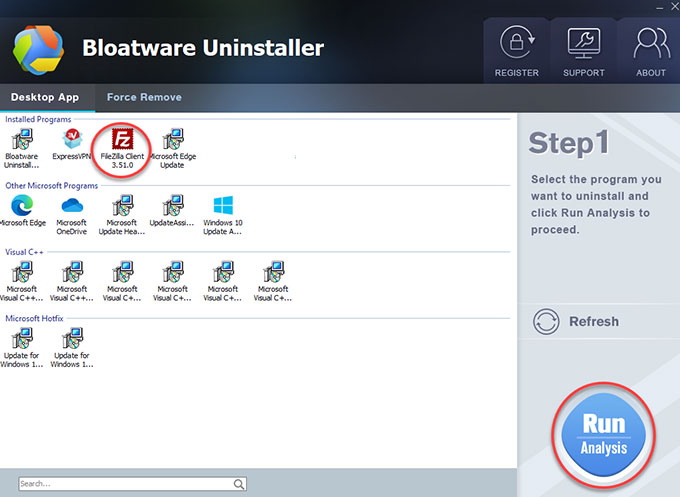
Step 1: Launch Bloatware Uninstaller > click the FileZilla program > click Run Analysis.
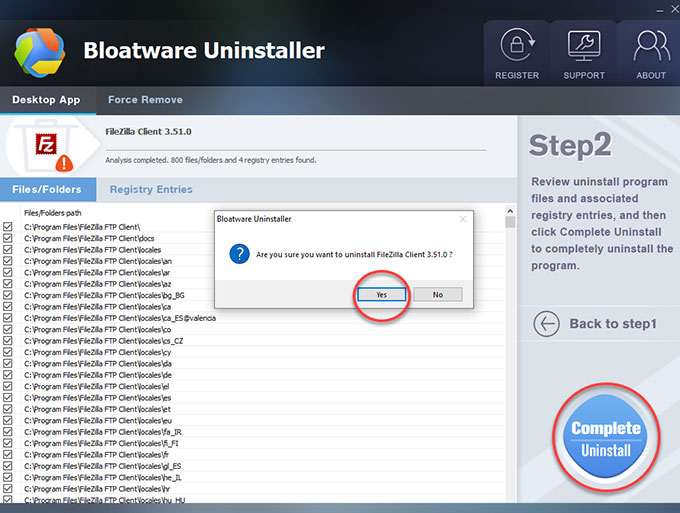
Step 2: Click Complete Uninstall > click Yes to confirm that you would like to uninstall FileZilla from your PC right now.
Step 3: Click Uninstall again to start the uninstallation, and the FileZilla program will be uninstalled from the following folder.
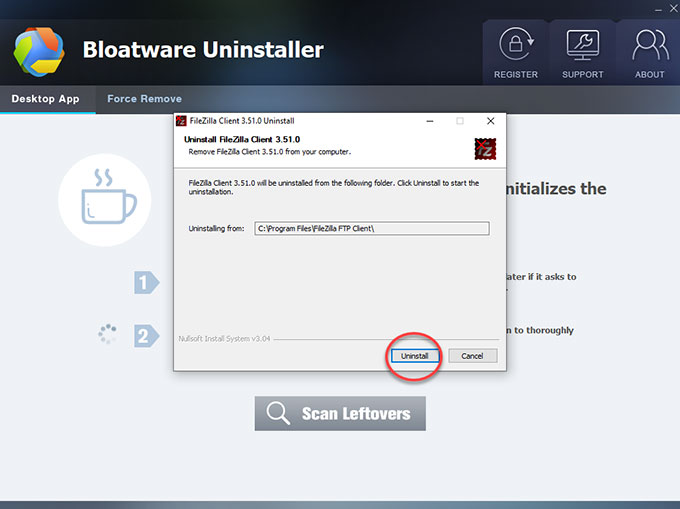
Step 4: FileZilla uninstallation complete. Click Finish > click Scan Leftovers to continue cleaning leftovers out.

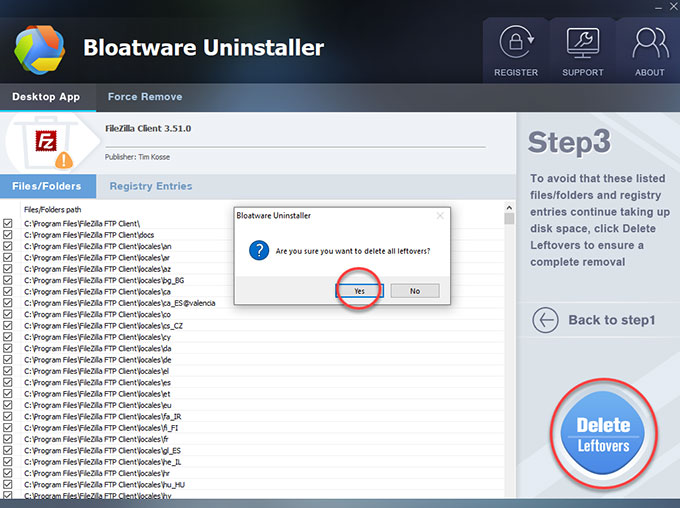
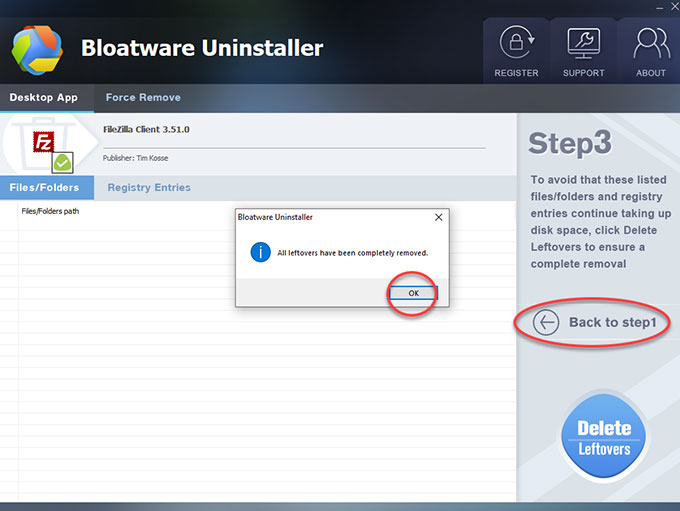
Step 5: Click Delete Leftovers > click Yes to confirm that you need to get rid of all FileZilla leftovers.
Step 6: All FileZilla leftovers have been completely deleted, click OK and click Back to Step 1 to check. Finally, Restart your PC.
Also: Look at the simple video tutorial for how to uninstall FileZilla in Bloatware Uninstaller.
Conclusion
So is this guide for you? This guide is right for anyone with no uninstalling experience, or who knows some Windows basics but would like to get an advanced uninstaller tool and confidently uninstall FileZilla and any unwanted programs thoroughly. For those of you interested in using a professional uninstaller, we have included a download button containing an optimal Bloatware Uninstaller, which will help you uninstall FileZilla in a flash.
Starting uninstalling today by clicking the download button below. You can get the provided Bloatware Uninstaller directly.
- Productivity Software
- 14 Jul 2021